Option 3: Configuring AWS IAM user credentials to access Amazon S3
This section describes how to configure a security policy for an S3 bucket and access credentials for a specific IAM user to access an external stage in a secure manner.
Step 1: Configure an S3 bucket access policy
AWS access control requirements
Snowflake requires the following permissions on an S3 bucket and folder to be able to access files in the folder (and any sub-folders):
s3:GetBucketLocations3:GetObjects3:GetObjectVersions3:ListBucket
Note
The following additional permissions are required to perform additional SQL actions:
Permission |
SQL Action |
|---|---|
|
Unload files to the bucket. |
|
Either automatically purge files from the stage after a successful load or execute REMOVE statements to manually remove files. |
As a best practice, Snowflake recommends creating an IAM policy and user for Snowflake access to the S3 bucket. You can then attach the policy to the user and use the security credentials generated by AWS for the user to access files in the bucket.
Creating an IAM policy
The following step-by-step instructions describe how to configure access permissions for Snowflake in your AWS Management Console so that you can use an S3 bucket to load and unload data:
Log into the AWS Management Console.
From the home dashboard, search for and select IAM.
From the left-hand navigation pane, select Account settings.
Under Security Token Service (STS) in the Endpoints list, find the Snowflake region where your account is located. If the STS status is inactive, move the toggle to Active.
From the left-hand navigation pane, select Policies.
Select Create Policy.
For Policy editor, select JSON.
Add the policy document that will allow Snowflake to access the S3 bucket and folder.
The following policy (in JSON format) provides Snowflake with the required access permissions for the specified bucket and folder path. You can copy and paste the text into the policy editor:
Note
Make sure to replace
bucketandprefixwith your actual bucket name and folder path prefix.The Amazon Resource Names (ARN) for buckets in government regions have a
arn:aws-us-gov:s3:::prefix.
{
    "Version": "2012-10-17",
    "Statement": [
        {
            "Effect": "Allow",
            "Action": [
              "s3:PutObject",
              "s3:GetObject",
              "s3:GetObjectVersion",
              "s3:DeleteObject",
              "s3:DeleteObjectVersion"
            ],
            "Resource": "arn:aws:s3:::<bucket_name>/<prefix>/*"
        },
        {
            "Effect": "Allow",
            "Action": [
                "s3:ListBucket",
                "s3:GetBucketLocation"
            ],
            "Resource": "arn:aws:s3:::<bucket_name>",
            "Condition": {
                "StringLike": {
                    "s3:prefix": [
                        "<prefix>/*"
                    ]
                }
            }
        }
    ]
}
Note
Setting the
"s3:prefix":condition to either["*"]or["<path>/*"]grants access to all prefixes in the specified bucket or path in the bucket, respectively.Select Next.
Enter a Policy name (for example,
snowflake_access) and an optional Description.Select Create policy.
Step 2: Create an AWS IAM user
Choose Users from the left-hand navigation pane, then click Add user.
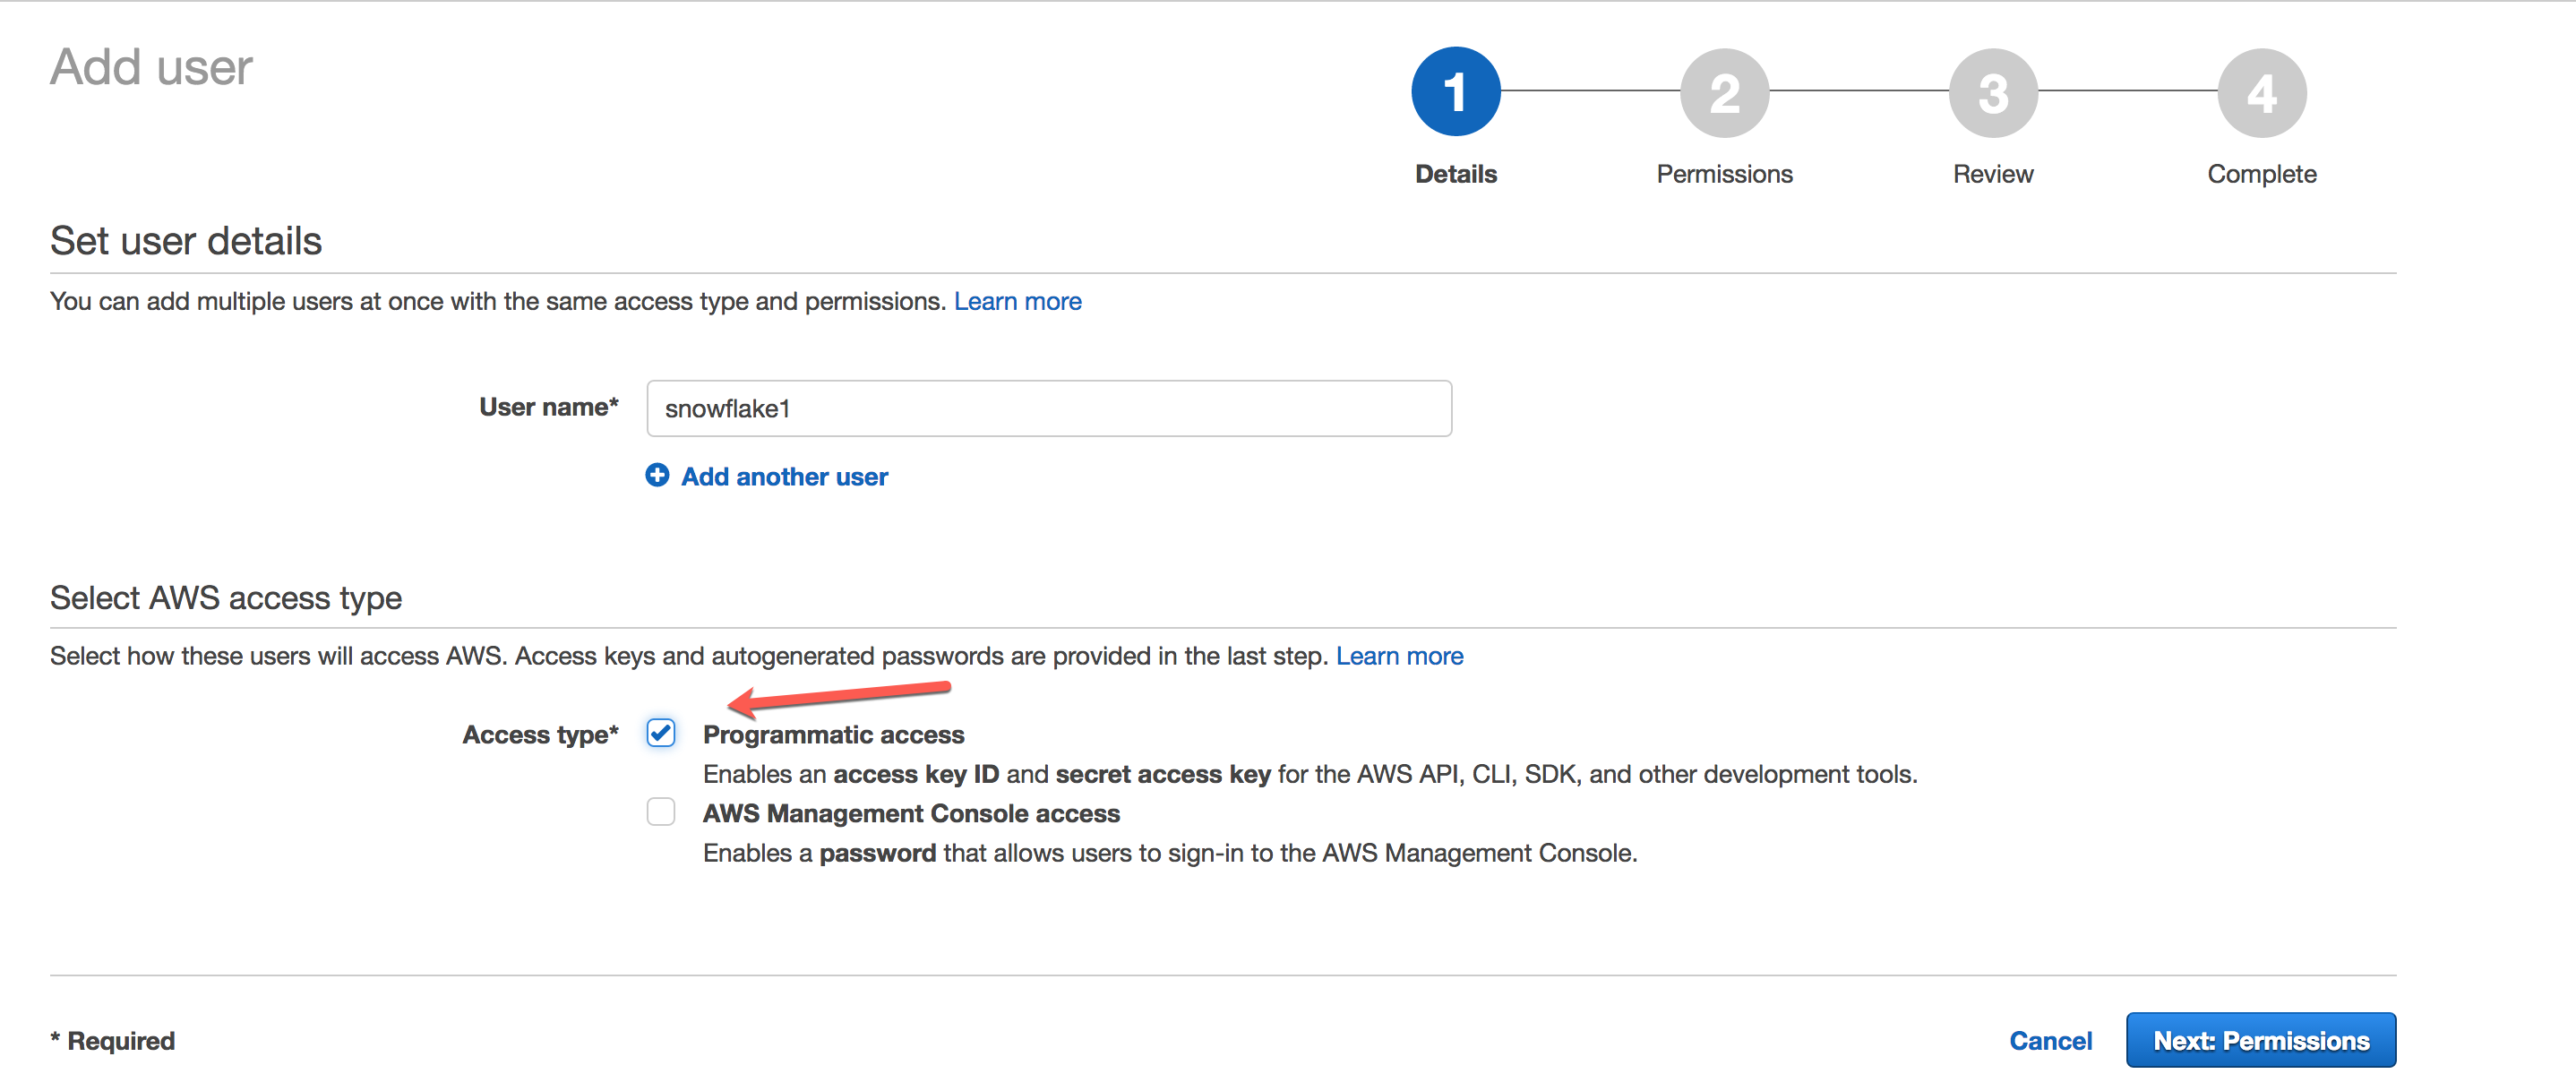
On the Add user page, enter a new user name (e.g.
snowflake1). Select Programmatic access as the access type, then click Next:
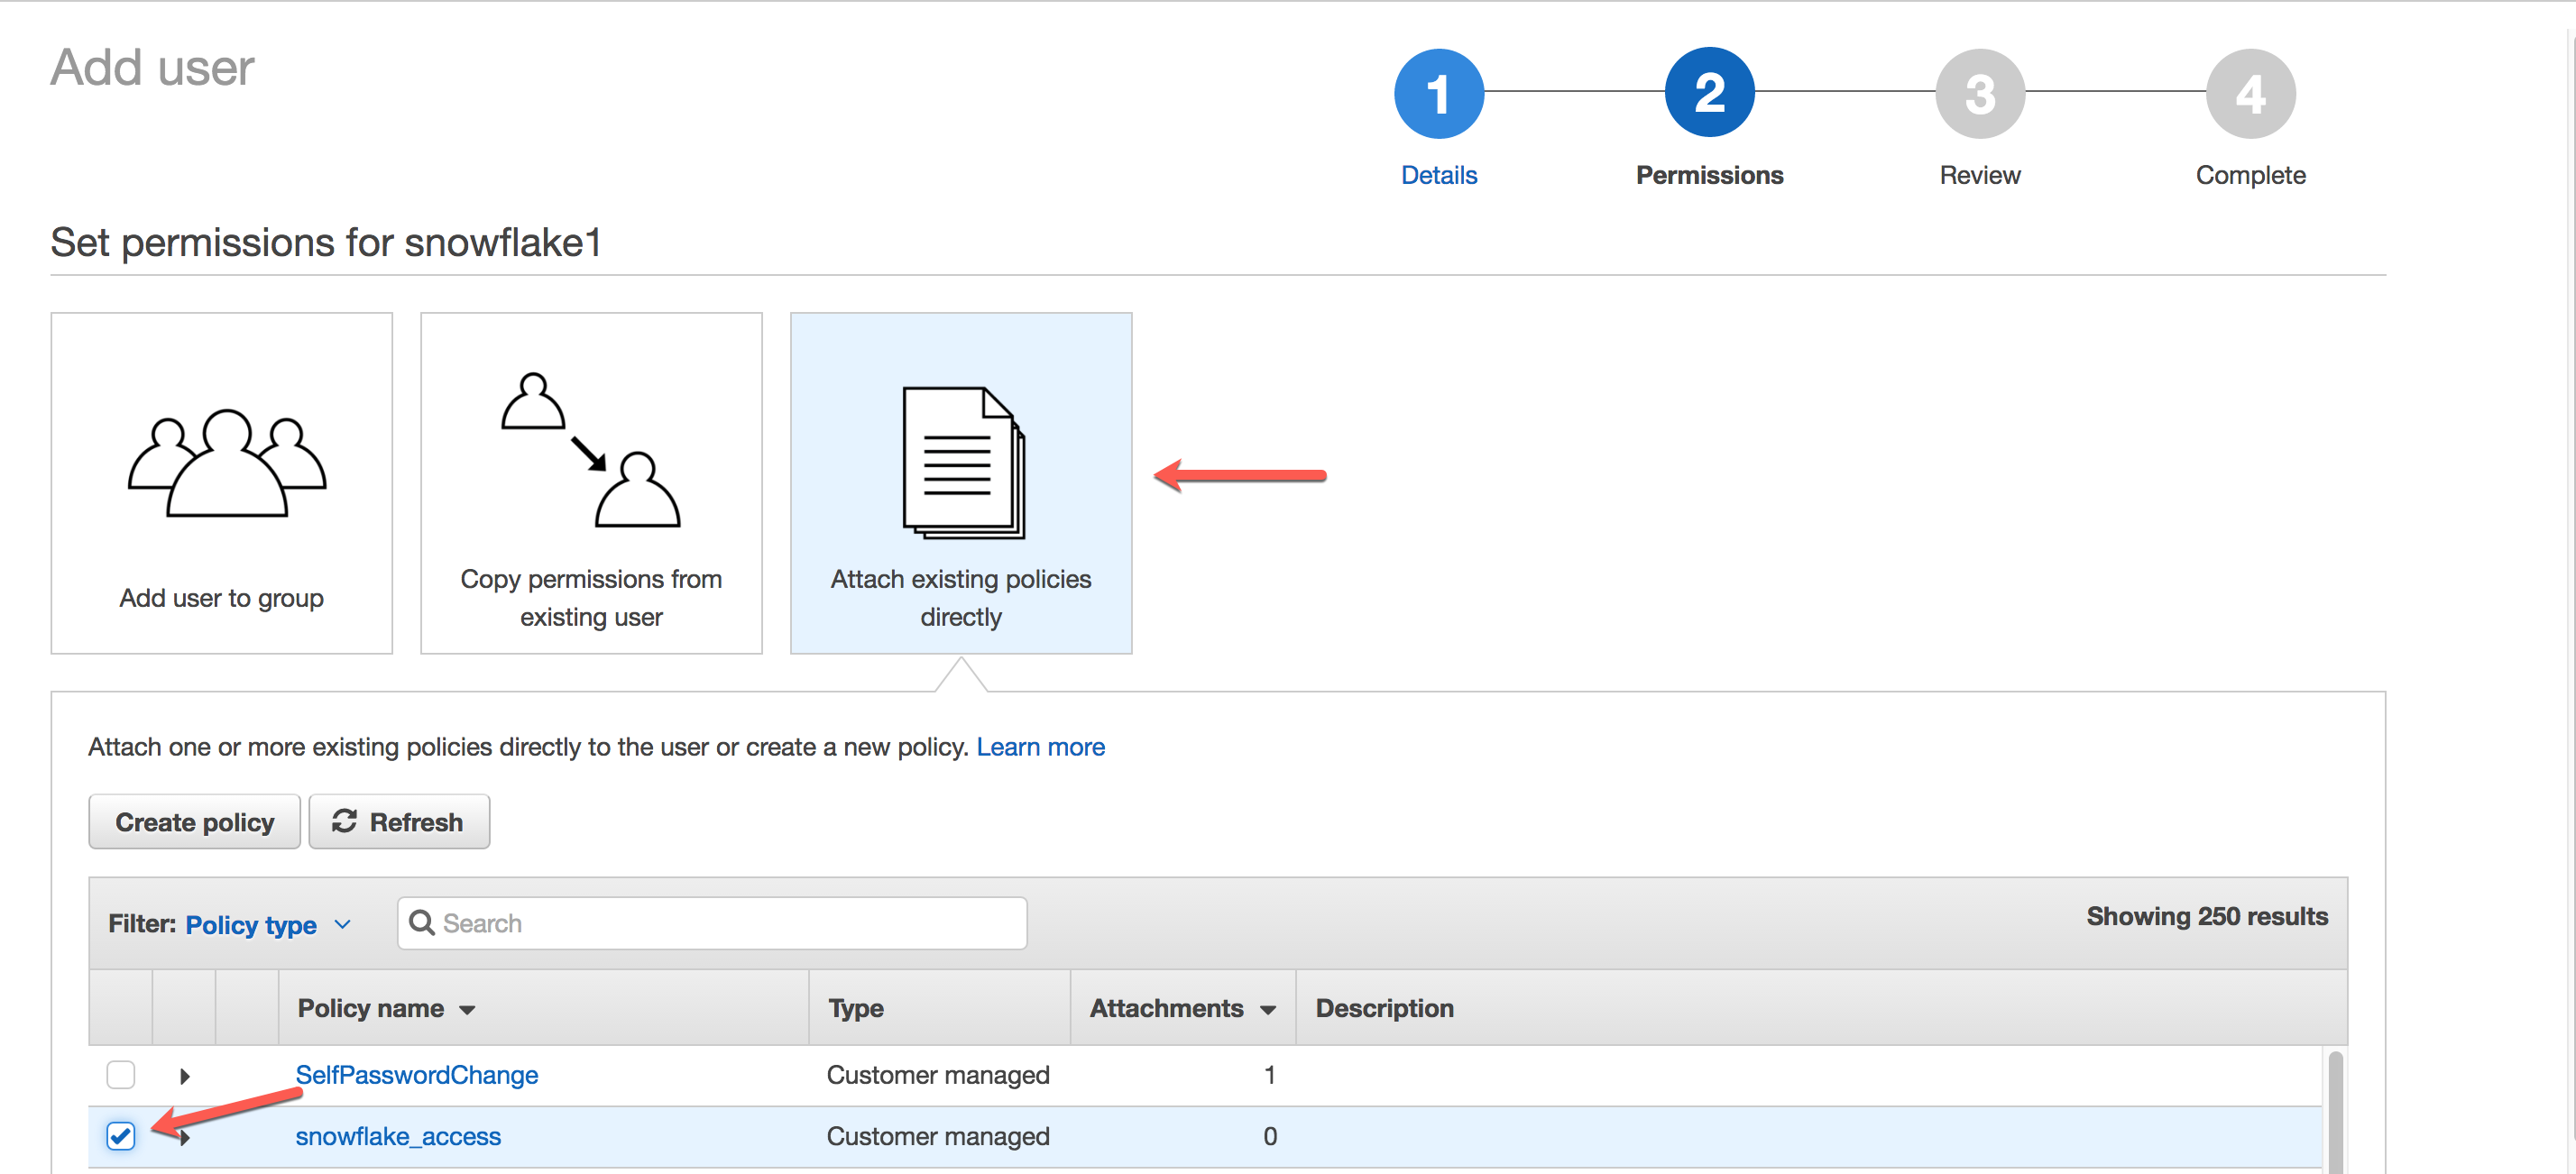
Click Attach existing policies directly, and select the policy you created earlier. Then click Next:

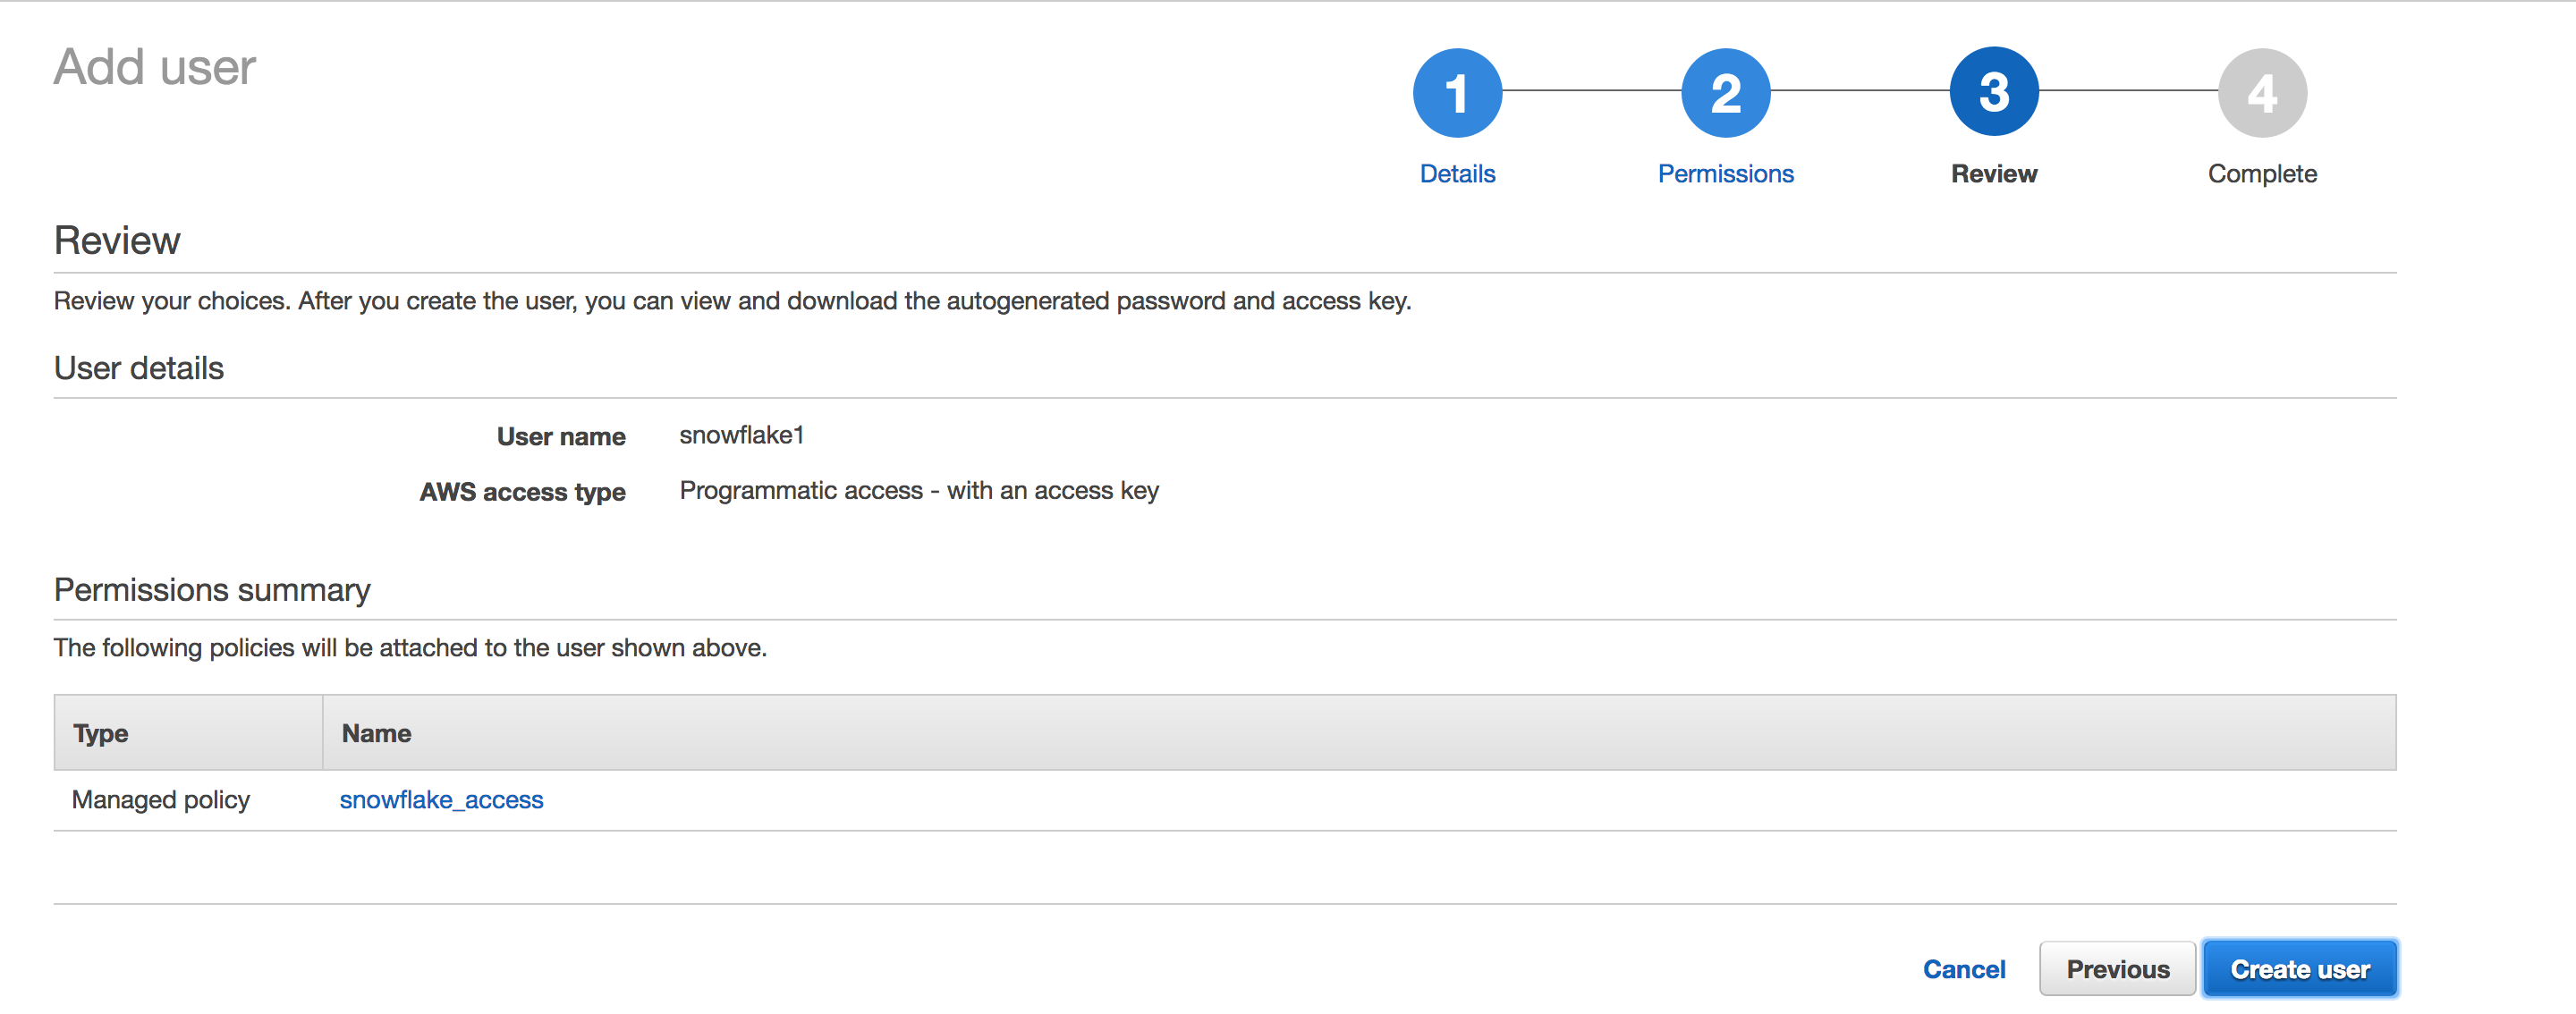
Review the user details, then click Create user.

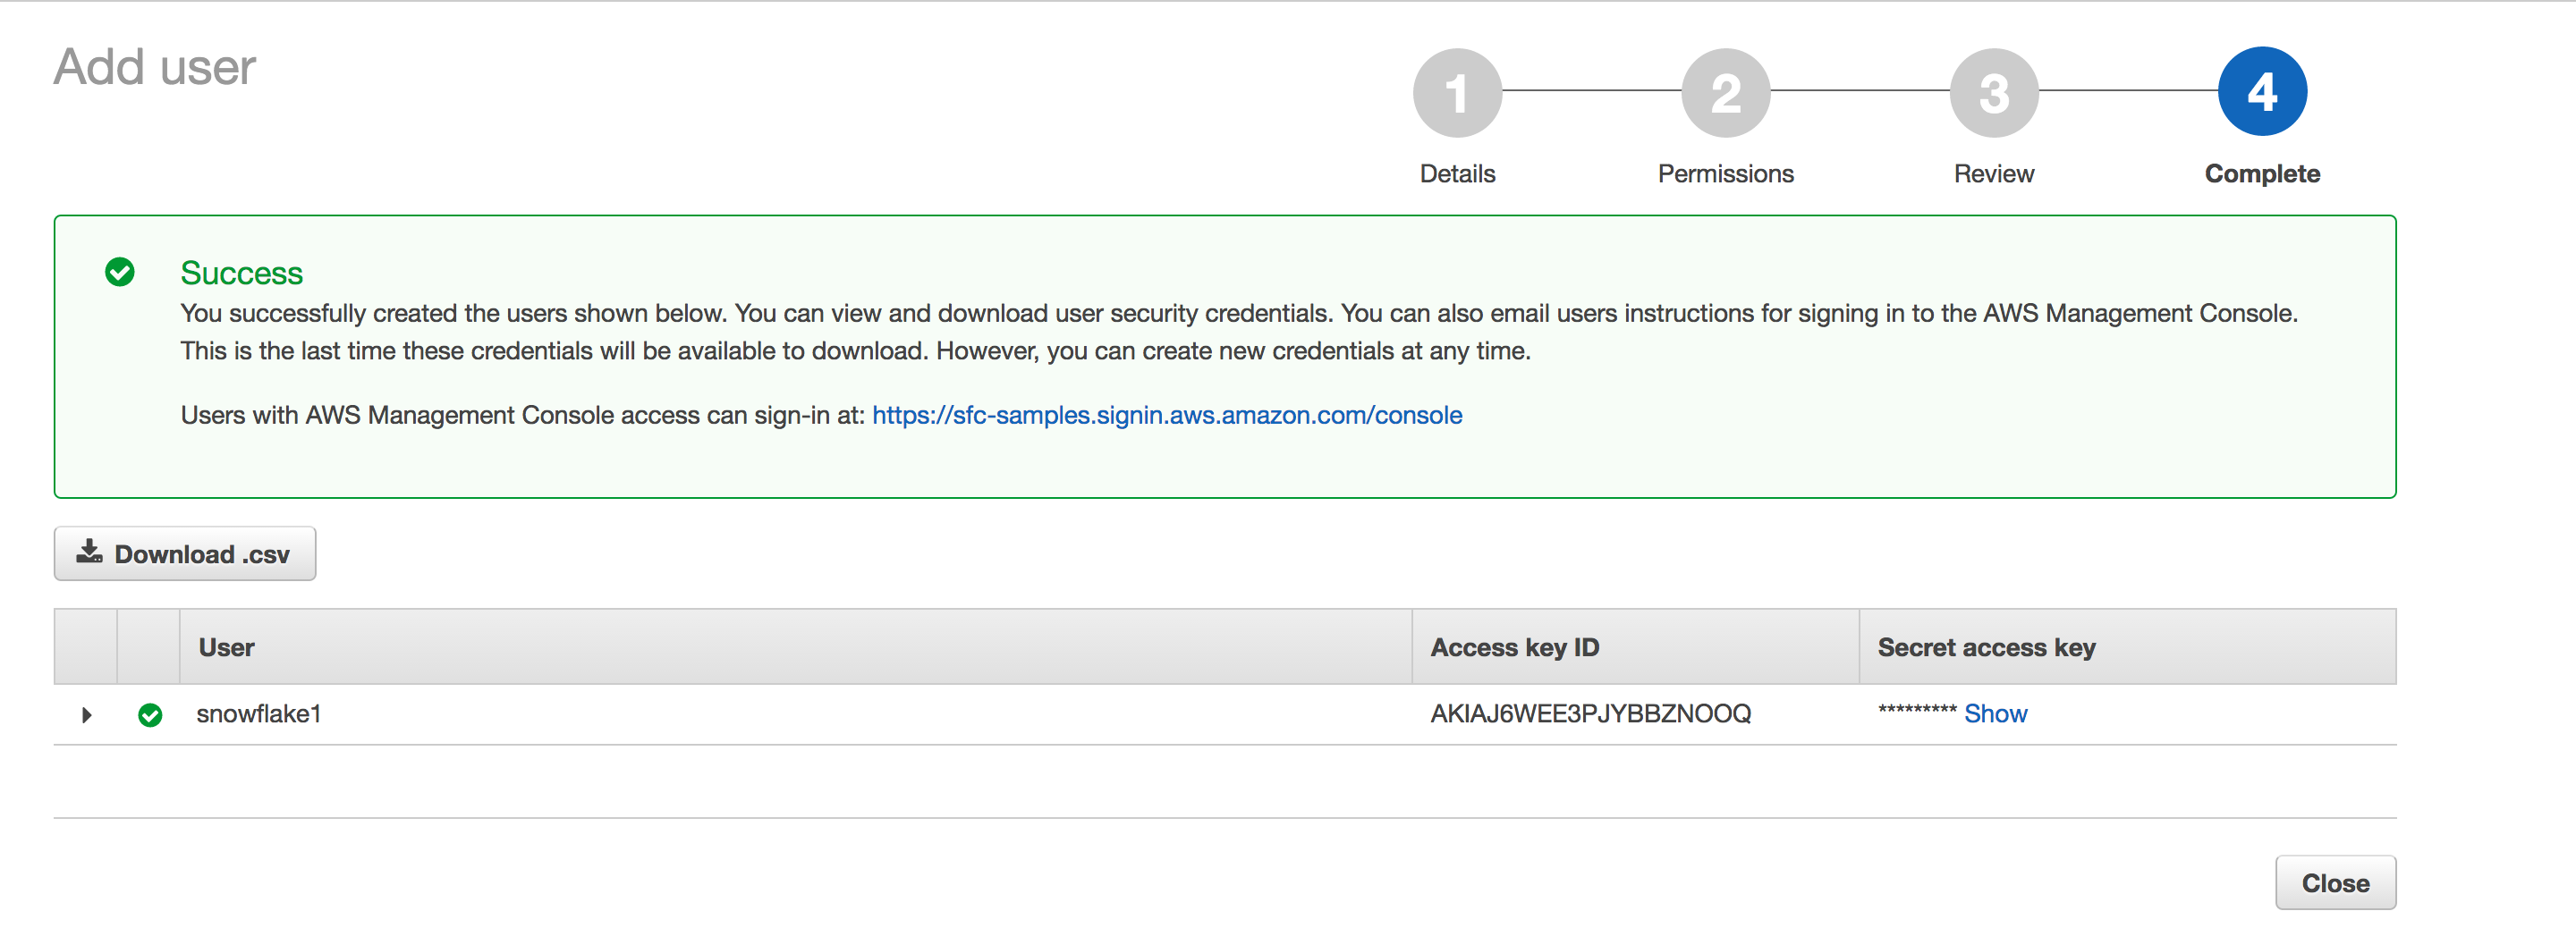
Record the access credentials. The easiest way to record them is to click Download Credentials to write them to a file (e.g.
credentials.csv)
Attention
Once you leave this page, the Secret Access Key will no longer be available anywhere in the AWS console. If you lose the key, you must generate a new set of credentials for the user.
You have now:
Created an IAM policy for a bucket.
Created an IAM user and generated access credentials for the user.
Attached the policy to the user.
With the AWS key and secret key for the S3 bucket, you have the credentials necessary to access your S3 bucket in Snowflake using an external stage.
Note
Snowflake caches the temporary credentials for a period that cannot exceed the 60 minute expiration time. If you revoke access from Snowflake, users might be able to list files and load data from the cloud storage location until the cache expires.
Step 3: Create an external (i.e. S3) stage
Create an external stage that references the AWS credentials you created.
Create the stage using the CREATE STAGE command, or you can choose to alter an existing external stage and set the CREDENTIALS option.
Note
Credentials are handled separately from other stage parameters such as ENCRYPTION and FILE_FORMAT. Support for these other parameters is the same regardless of the credentials used to access your external S3 bucket.
For example, set mydb.public as the current database and schema for the user session, and then create a stage named my_S3_stage. In this example, the stage references the S3 bucket and path mybucket/load/files. Files in the S3 bucket are encrypted with server-side encryption (AWS_SSE_KMS):
USE SCHEMA mydb.public;

CREATE OR REPLACE STAGE my_S3_stage
  URL='s3://mybucket/load/files/'
  CREDENTIALS=(AWS_KEY_ID='1a2b3c' AWS_SECRET_KEY='4x5y6z')
  ENCRYPTION=(TYPE='AWS_SSE_KMS' KMS_KEY_ID = 'aws/key');
Next: AWS data file encryption