AI powered code conversion
AI code conversion (or AI-powered code conversion) strengthens the migration process by using AI agents to convert more objects through automated functional validation of converted database code. It uses synthetic data generation, AI-driven unit testing, and AI-driven resolution of errors identified in the deterministic code conversion step, where error warnings and issues (EWIs) and functional difference messages (FDMs) flag conversion issues—along with an intelligent layer in the Snowflake Service that proactively converts code, verifies correctness, resolves errors, and accelerates confidence.
During migration, deterministic logic is first used to translate the source code, surfacing EWIs and FDMs when it cannot automatically resolve certain patterns. Then, AI code conversion is used to reduce manual remediation effort, identify and resolve issues earlier in the process, and provide assurance to users that the converted objects behave as expected.
Key features of AI code conversion
Accelerated AI validation: Dramatically reduce the time and resources you spend on manual testing.
Automated Test generation: The agent automatically generates test cases based on your existing queries and business logic.
Agentic Repair suggestions: The agent suggests patches to your existing code to produce consistent results between your legacy system and Snowflake.
Prerequisites for AI code conversion
Before you get started with AI code conversion, complete the following steps:
Download and install SnowConvert AI.
[Recommended] Convert your legacy SQL Server code by using SnowConvert AI.
Connect an account specifically designated for testing and development and avoid using a production account.
Some objects will be created as part of the AI code conversion process.
Ensure the PUBLIC role in the account you connect doesn’t have access to any production data and doesn’t have privileges to execute any sensitive operations, such as CREATE USER commands.
Ensure that the role used for AI code conversion has the following privileges on the account:
CREATE DATABASE
CREATE MIGRATION
Enable Cortex AI SQL functions in the account, specifically for model
claude-4-sonnet.To enable the model if it’s not available in your region, see Cross-region inference.
Getting started with AI code conversion
To begin a migration validation project, complete the following steps:
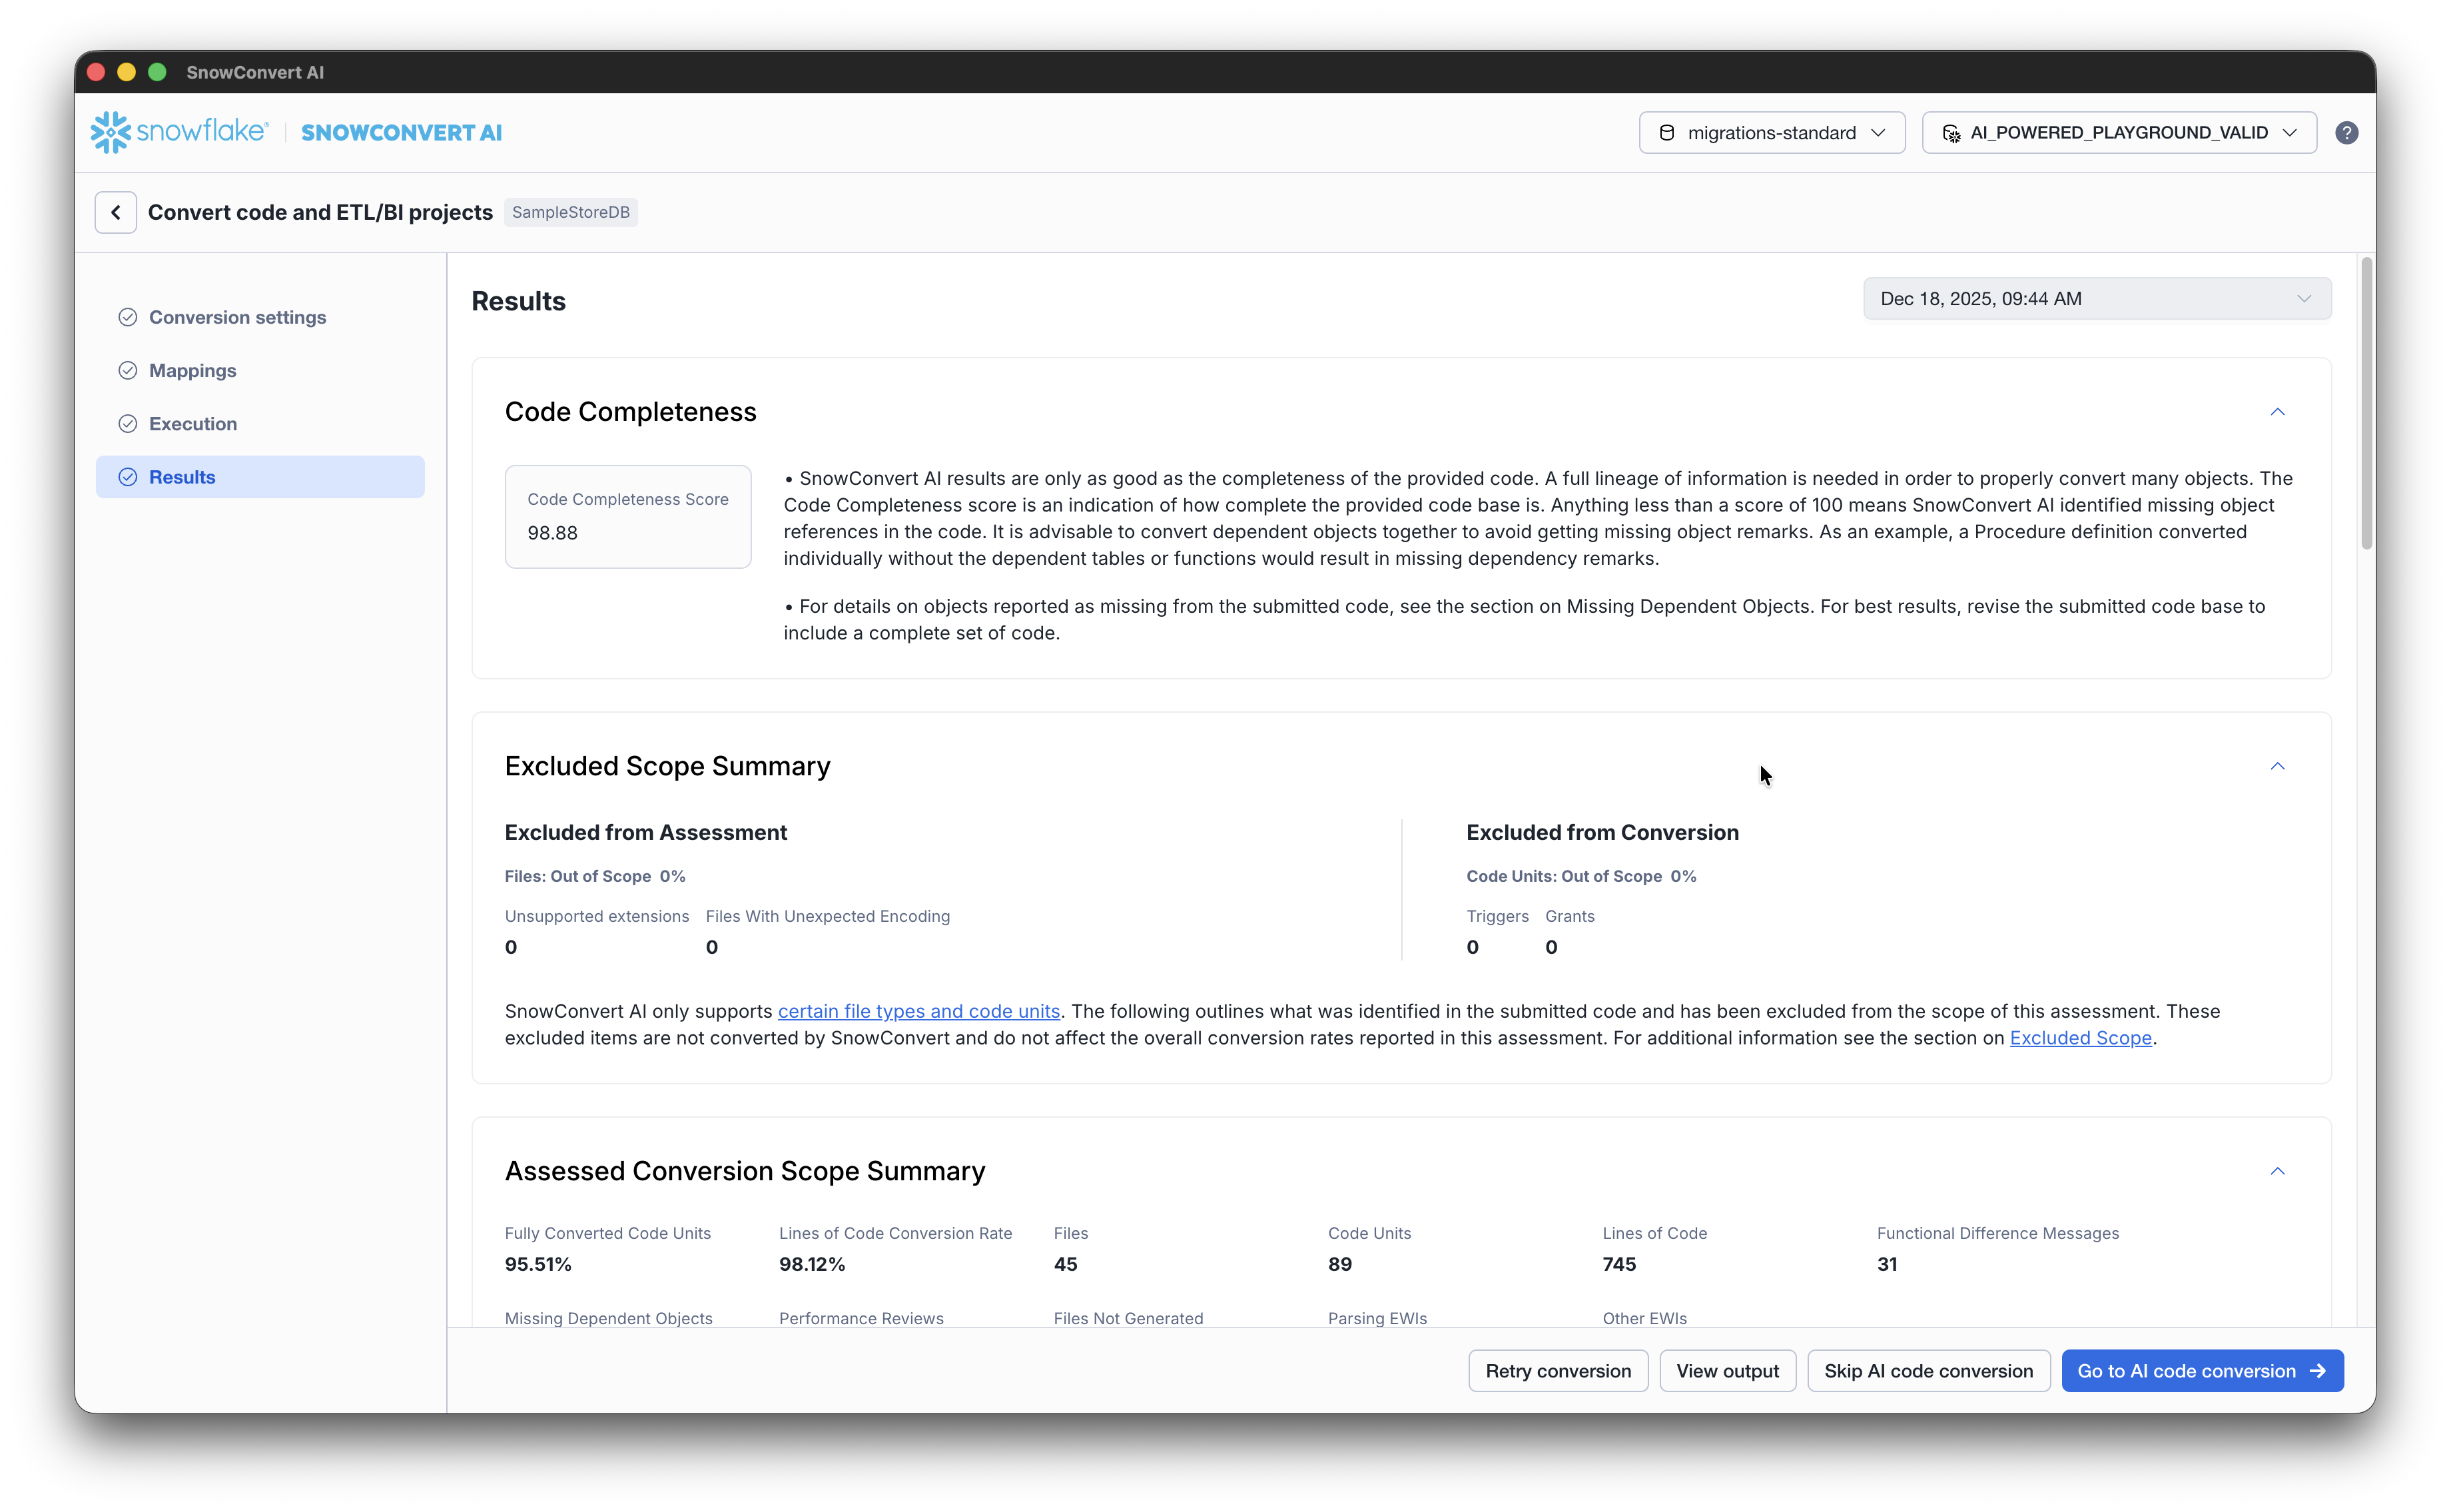
Execute the code conversion of SnowConvert AI on your SQL Server database.
After the code conversion is complete, select GO TO AI code conversion from the Results page.

(i) All AI processing happens in the Snowflake account you connect to and consumes Snowflake charges.
You will be redirected to the Connect to Snowflake page to enter the connection parameters of a testing account. This is necessary to ensure that the AI code conversion process creates objects and executes queries in the test database and avoids unintended changes to the production database. Select Continue.
Acknowledge and confirm the AI disclaimers and select Continue.
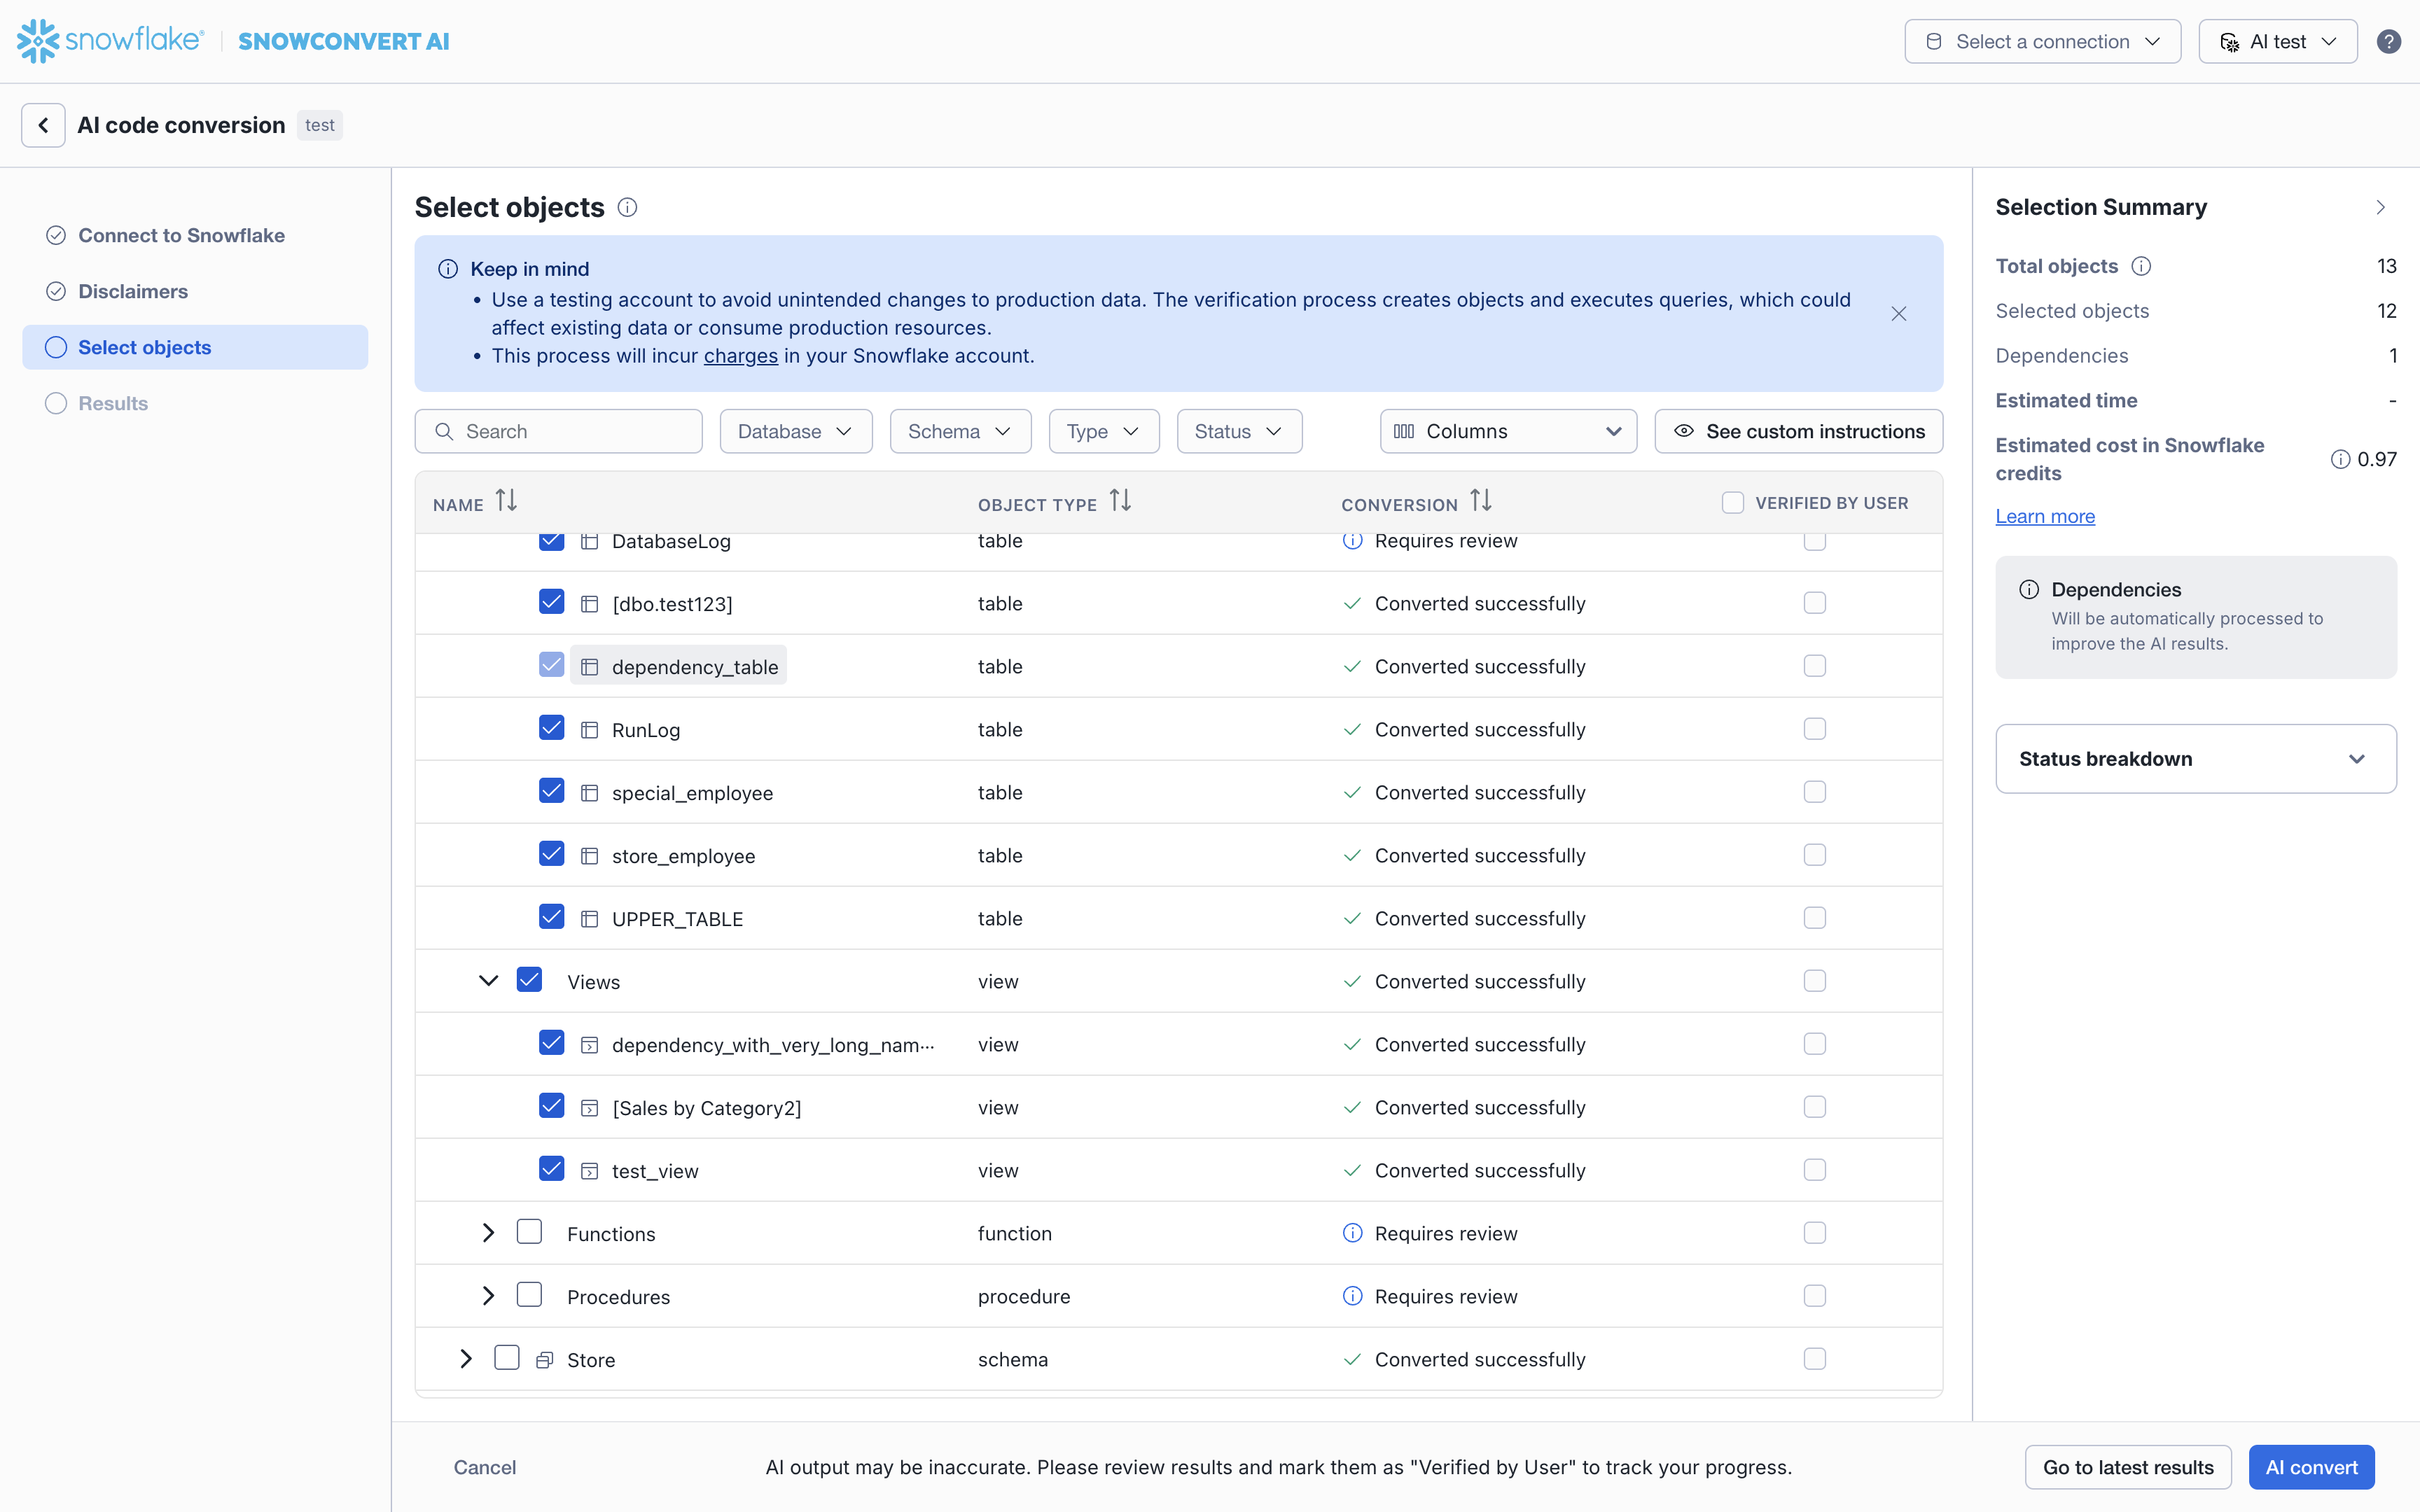
The Select objects page displays the current conversion status of each database object under the Conversion column. Select the required objects for AI code conversion. You can also run an AI code conversion process with source-system verification by selecting Upload custom instructions.

SnowConvert automatically performs the following actions:
Automatically selects and validates dependent objects when they are associated with your chosen objects.
Reviews a summary of the selected objects, their dependencies, and the estimated time and Snowflake credit cost.
Confirms the selection to proceed with code conversion.
Select AI Convert. SnowConvert AI connects to your Snowflake account, where it relies on Cortex AI Functions to review your code and suggest resolutions to any problems. AI code conversion might take a few minutes to start, and it might run for several minutes or hours depending on the complexity of the code being verified.
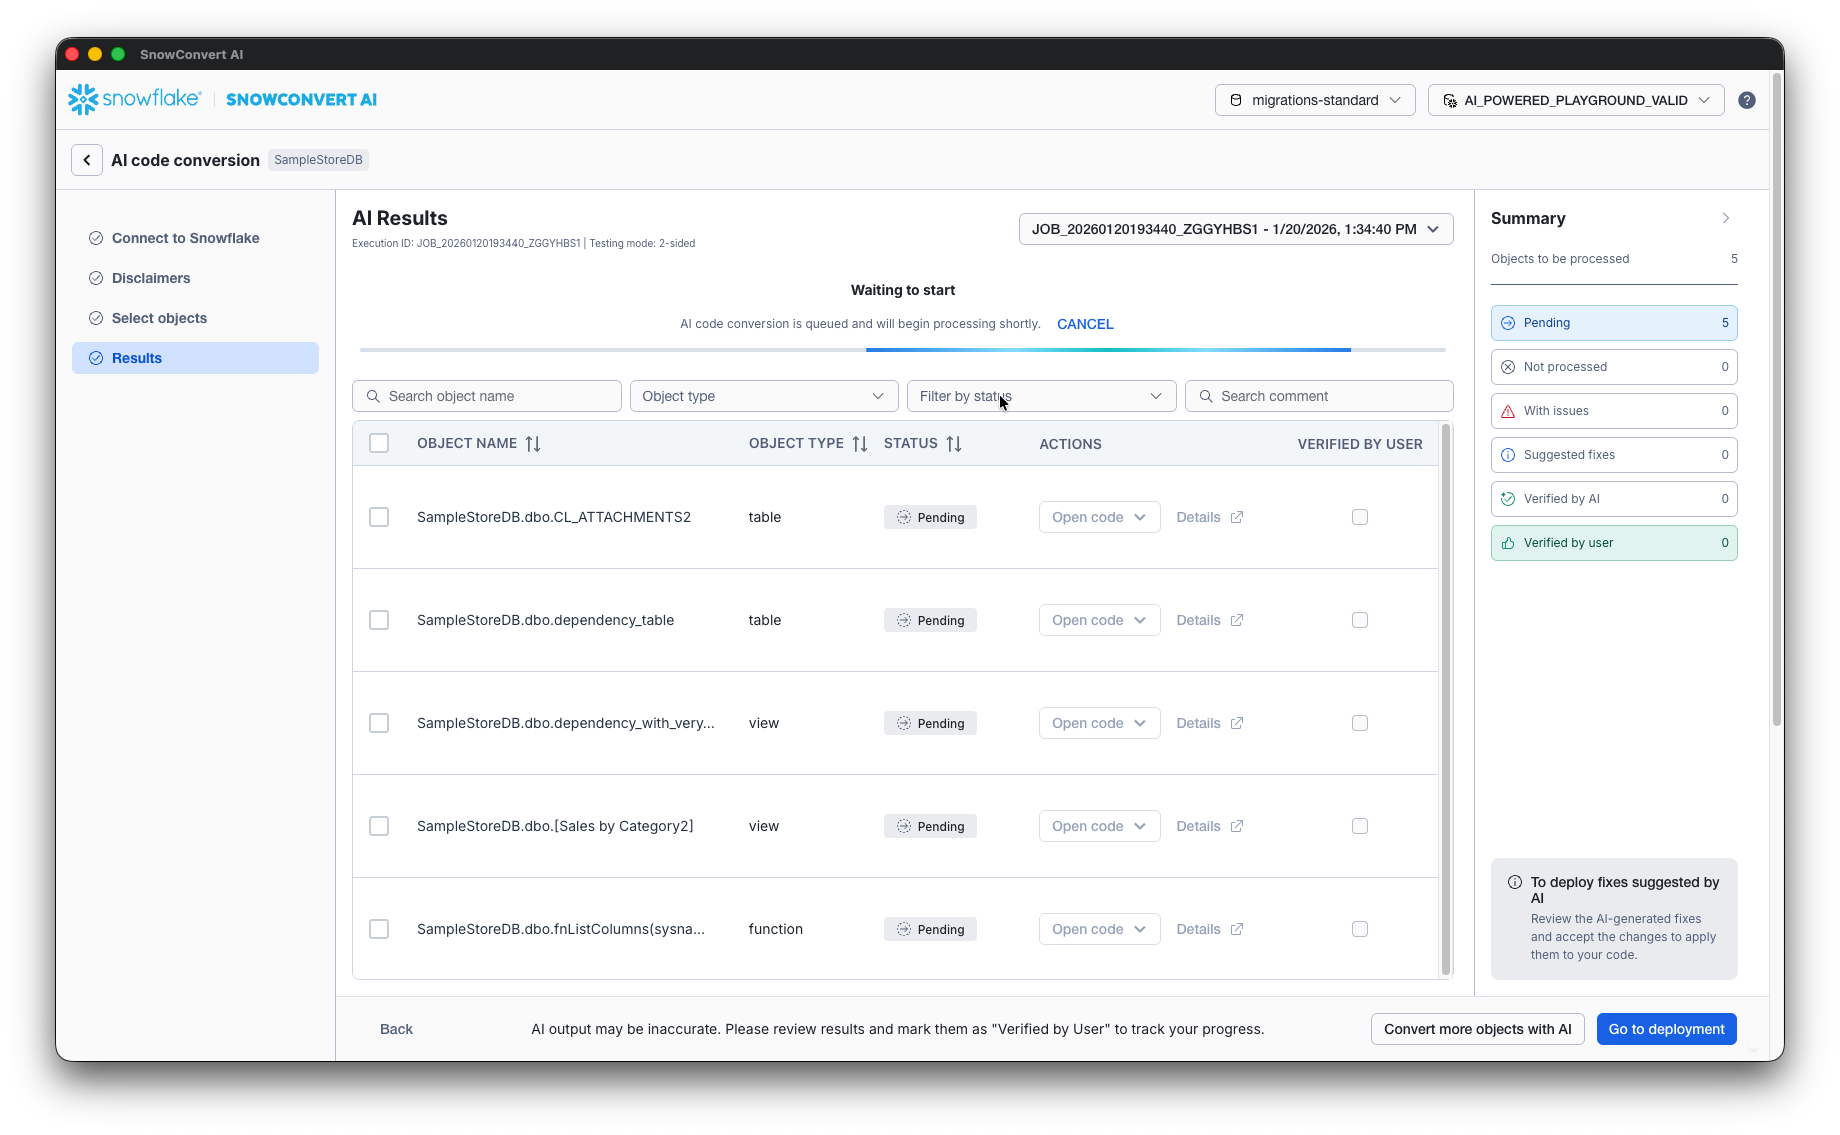
The AI Results page shows the status for the AI code conversion of selected objects. The Status column indicates the AI code conversion outcomes. Select Details to review the test code and test results, source code, and converted code.

(i) Review the code generated by AI before deploying it. Code generated by AI might not be correct.
Status of the AI code conversion:
Fixed with AI
Could not verify
Verified
Error in original object
OPEN CODE:
By default, this option opens and compares your original source code and the code generated by the AI code conversion process in VS Code.
If you click the arrow next to OPEN CODE, you also have the option to open and compare in VS Code:
The converted code from SnowConvert and the code converted by AI.
Select VERIFIED BY USER for all objects for which you have accepted the AI code conversion. Only objects that are verified by the user can be deployed.
Billing and cost considerations with SnowConvert AI code conversion
AI code conversion consumes Snowflake credits based on the compute resources it uses in your Snowflake account. The following features contribute to the cost:
AI SQL - AI code conversion uses Cortex AI SQL.
Warehouse - Test queries are executed in a warehouse.
Snowflake stages - Input and outputs for AI code conversion are stored in a stage, which incurs storage costs.
SPCS - AI code conversion might consume a small amount of credits to use Snowpark Container Services. To find the costs associated with AI code conversion, look for compute pools with names that start with
AI_MIGRATOR. For more information, see Snowpark Container Services costs.
For more information, see Snowflake Service Consumption Table.
Limitations of AI powered code conversion
The initial version is optimized for standard SQL Server migrations. While migration process can handle many query types, all the changes generated by SnowConvert AI code conversion must be reviewed by the customer before they can be deployed to any account.
Legal notices for AI features
Your use of Snowflake AI features is subject to all agreements, terms or policies that apply to such usage, including but not limited to those documented in the Snowflake AI & ML Documentation.