Bulk loading from Microsoft Azure
If you already have a Microsoft Azure account and use Azure blob storage containers for storing and managing your data files, you can make use of your existing containers and folder paths for bulk loading into Snowflake.
Note
To harden your security posture, you can configure your bulk load to use private connectivity rather than the public Internet. For more information, see Private connectivity to external stages and Snowpipe automation for Microsoft Azure.
This set of topics describes how to use the COPY command to load data from an Azure container into tables.
Snowflake currently supports loading from blob storage only. Snowflake supports the following types of storage accounts:
Blob storage
Data Lake Storage Gen2
General-purpose v1
General-purpose v2
Microsoft Fabric OneLake
Snowflake doesn’t support Data Lake Storage Gen1.
Note
For Microsoft Fabric OneLake, Snowflake doesn’t support the following features:
Automated Snowpipe
Automatic refresh for external tables and directory tables
Private connectivity
Loading from block, append, and page blobs is supported. Unloaded files are created as block blobs. For information about these blob types, see the Azure documentation on blob types (https://docs.microsoft.com/en-us/rest/api/storageservices/understanding-block-blobs--append-blobs--and-page-blobs).
If a hierarchical namespace is enabled on Data Lake Storage Gen2, Snowflake doesn’t support purging files with the COPY command. A hierarchical namespace organizes data into directories and subdirectories. Azure only allows you to delete empty directories, which means that you can’t delete directories recursively by using the PURGE option with the COPY command.
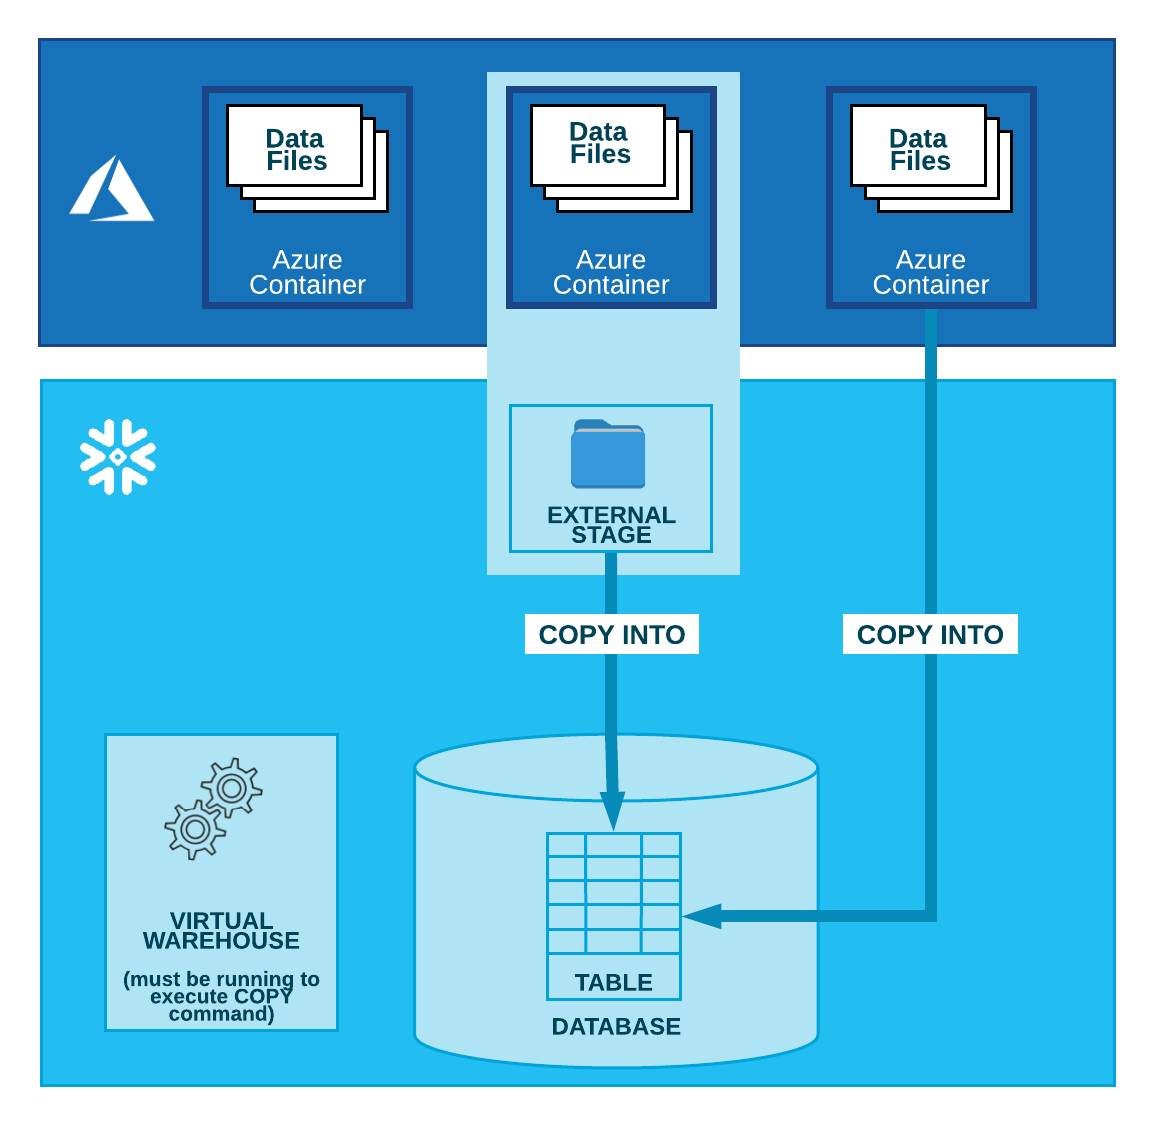
As illustrated in the following diagram, loading data from an Azure container is performed in two steps:
- Step 1:
Snowflake assumes the data files have already been staged in an Azure container. If they haven’t been staged yet, use the upload interfaces/utilities provided by Microsoft to stage the files.
- Step 2:
Use the COPY INTO <table> command to load the contents of the staged file(s) into a Snowflake database table. You can load directly from the bucket, but Snowflake recommends creating an external stage that references the bucket and using the external stage instead.
Regardless of the method you use, this step requires a running, current virtual warehouse for the session if you execute the command manually or within a script. The warehouse provides the compute resources to perform the actual insertion of rows into the table.

Note
As long as your Snowflake account is hosted on Azure, your network traffic does not traverse the public internet.
Tip
The instructions in this set of topics assume you have read Preparing to load data and have created a named file format, if desired.
Before you begin, you may also want to read Data loading considerations for best practices, tips, and other guidance.
Next Topics:
Configuration tasks (complete as needed):
Data loading tasks (complete for each set of files you load):