Tutorial 1: Build a simple search application with Cortex Search
Introduction
This tutorial describes how to get started with Cortex Search for a simple search application.
What you will learn
- Create a Cortex Search Service from on an AirBnb listings dataset.
- Create a Streamlit in Snowflake app that lets you query your Cortex Search Service.
Prerequisites
The following prerequisites are required to complete this tutorial:
- You have a Snowflake account and user with a role that grants the necessary privileges to create a database, tables, virtual warehouse objects, Cortex Search services, and Streamlit apps.
Refer to the Snowflake in 20 minutes for instructions to meet these requirements.
Step 1: Setup
Getting the sample data
You will use a sample dataset hosted on Huggingface , downloaded as a single JSON file. Download the file directly from your browser by following this link:
- AirBnB listings dataset
Note
In a non-tutorial setting, you would bring your own data, possibly already in a Snowflake table.
Creating the database, tables, and warehouse
Execute the following statements to create a database and a virtual warehouse needed for this tutorial. After you complete the tutorial, you can drop these objects.
Note the following:
- The
CREATE DATABASEstatement creates a database. The database automatically includes a schema named ‘public’. - The
CREATE WAREHOUSEstatement creates an initially suspended warehouse. The statement also setsAUTO_RESUME = true, which starts the warehouse automatically when you execute SQL statements that require compute resources.
Step 2: Load the data into Snowflake
Before you can create a search service, you must load the example data into Snowflake.
You can upload the dataset in Snowsight or using SQL. To upload in Snowsight:
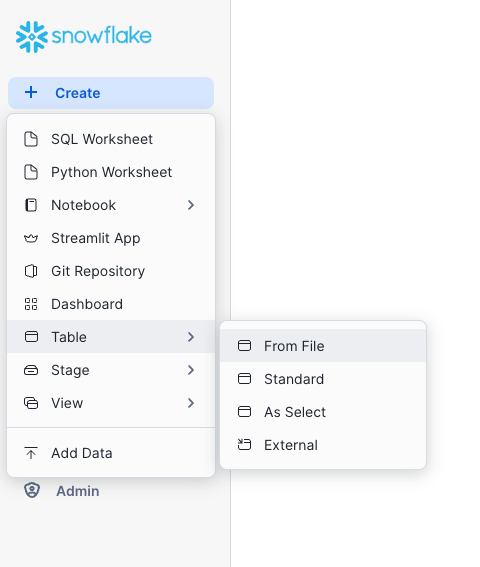
-
Select the + Create button above the left navigation bar.
-
Then select Table » From File.
-
Select your newly-created warehouse as a warehouse for your table from the drop-down at the top right corner.
-
Drag and drop the JSON data file into the dialog.
-
Select the database you created above and specify the PUBLIC schema.
-
Finally, specify the creation of a new table called
airbnb_listingsand select Next.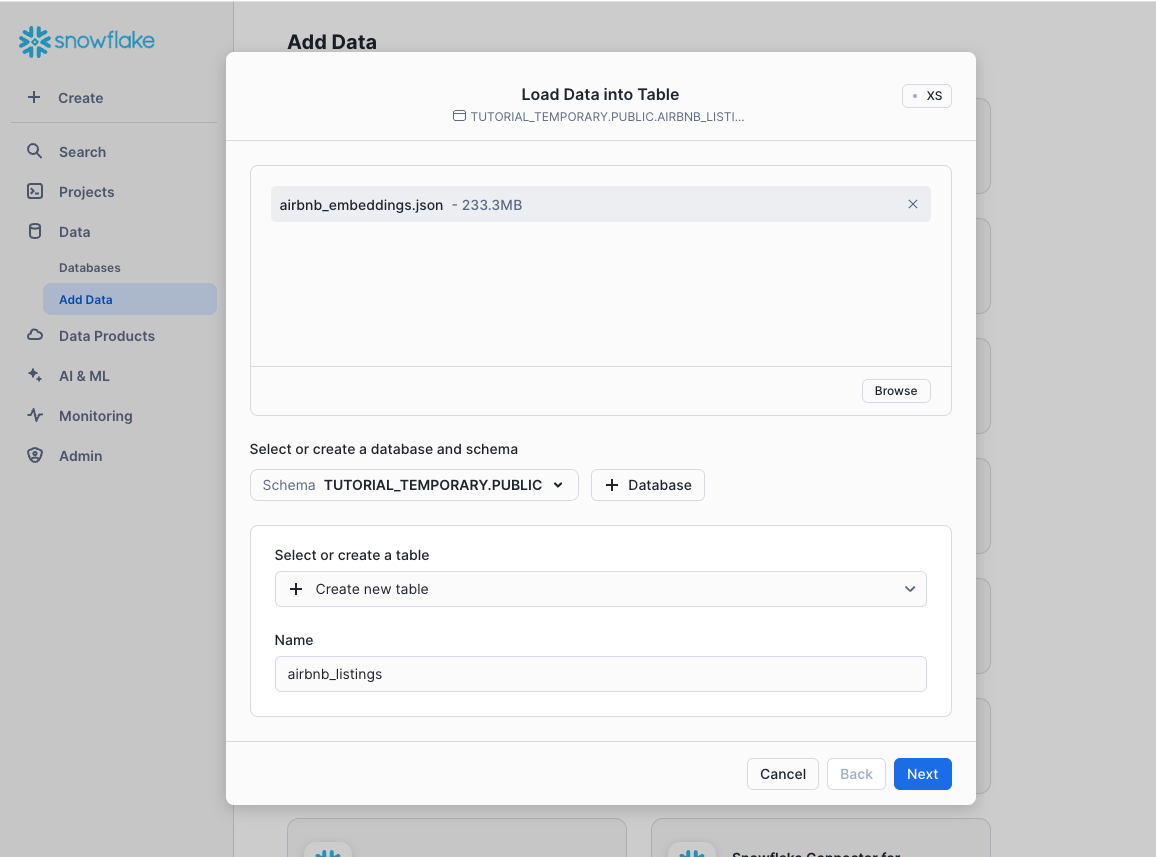
-
In the Load Data into Table dialog, make the following adjustments. First, uncheck the
image_embeddings,images, andtext_embeddingscolumns, since those do not apply to this tutorial. Second, adjust the datatype of theamenitiesfield to be ARRAY type.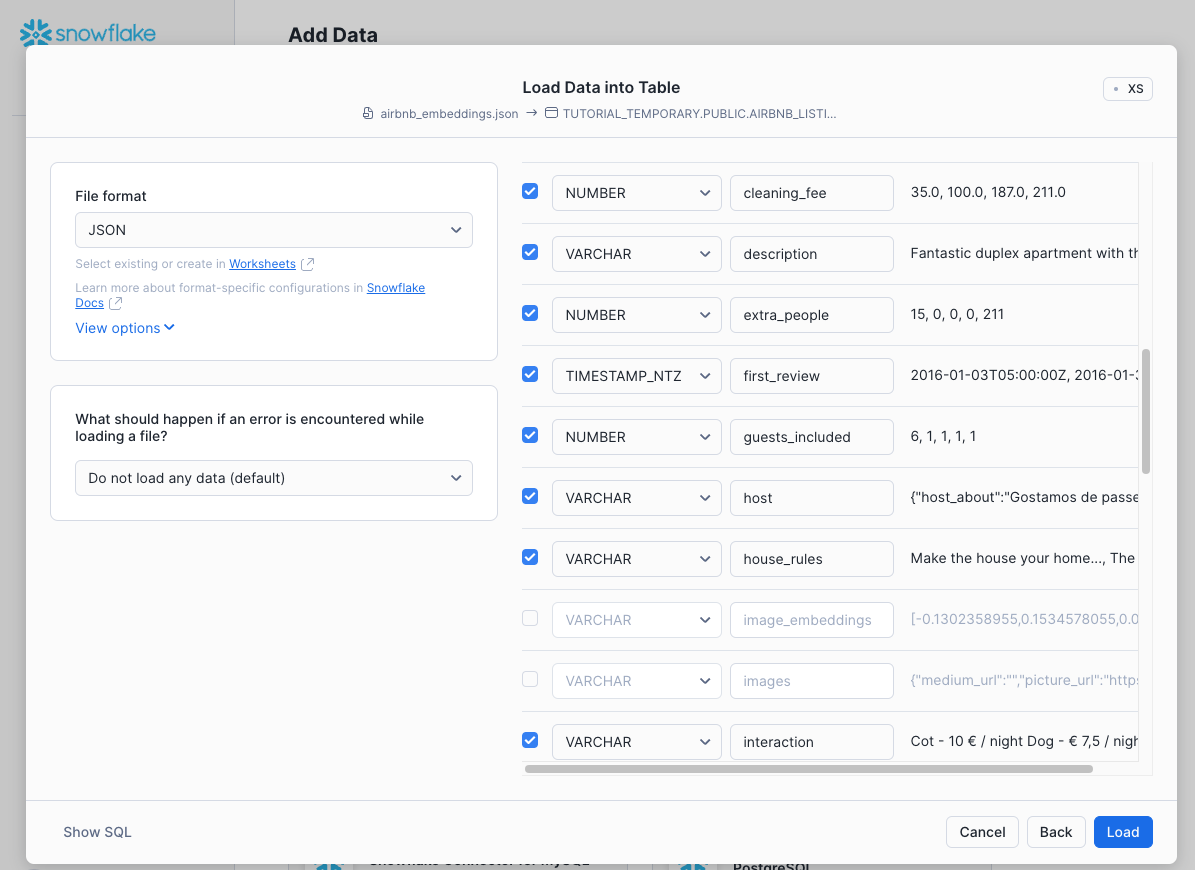
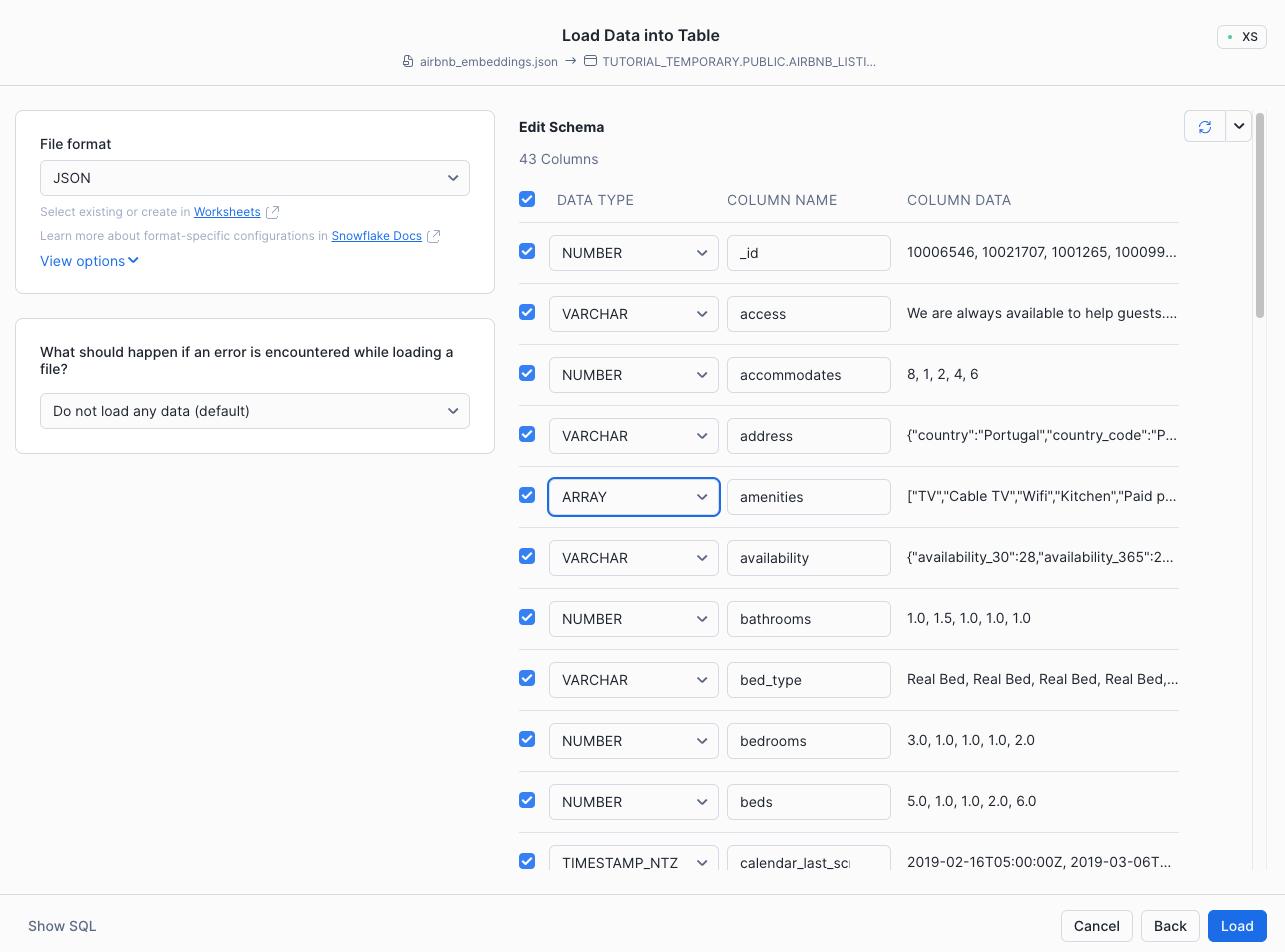
-
Once you have made these adjustments, Select Load to proceed.
-
After a brief moment, you should see a confirmation page showing that the data has been loaded.
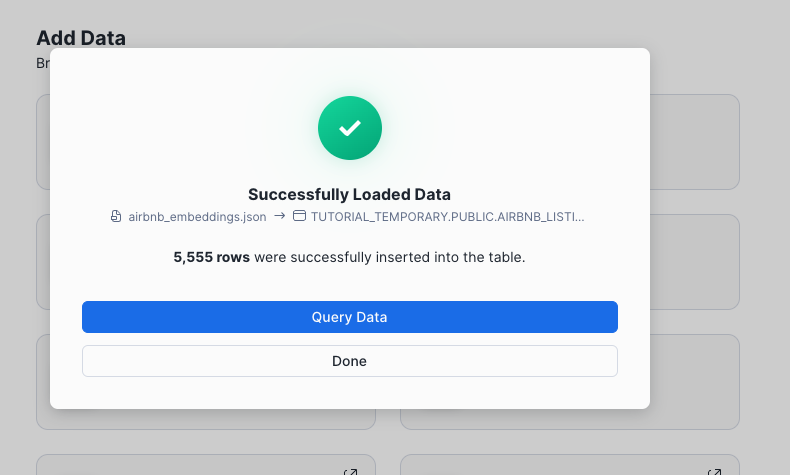
-
Select Query Data to open up a new Snowsight worksheet that you will use in the next step.
Step 3: Create the search service
Create a search service over our new table by running the following SQL command.
- Let’s break down the arguments in this command:
- The
ONparameter specifies the column for queries to search over. In this case, it’s thelisting_text, which is generated in the source query as a concatenation of several text columns in the base table. - The
ATTRIBUTESparameter specifies the columns that you will be able to filter search results on. This example filters onroom_typeandamenitieswhen issuing queries to thelisting_textcolumn. - The
WAREHOUSEandTARGET_LAGparameters specify the user-provided warehouse and the desired freshness of the search service, respectively. This example specifies to use thecortex_search_tutorial_whwarehouse to create the index and perform refreshes, and to keep the service no more than'1 hour'behind the source tableAIRBNB_LISTINGS. - The
ASfield defines the source table for the service. This example concatenates several text columns in the original table into the search columnlisting_textso that queries can search over multiple fields.
- The
Step 4: Create a Streamlit app
You can query the service with Python SDK (using the snowflake Python package). This tutorial
demonstrates using the Python SDK in a Streamlit in Snowflake application.
First, ensure your global Snowsight UI role is the same as the role used to create the service in the service creation step.
- Sign in to Snowsight.
- In the navigation menu, select Projects » Streamlit.
- Select + Streamlit App.
- Important: Select the
cortex_search_tutorial_dbdatabase andpublicschema for the app location. - In the left pane of the Streamlit in Snowflake editor, select Packages and add
snowflake(version >= 0.8.0) to install the package in your application. - Replace the example application code with the following Streamlit app:
Here’s a brief breakdown of the major components in the Streamlit-in-Snowflake code above:
get_column_specificationuses a DESCRIBE SQL query to get information about the attributes available in the search service and stores them in Streamlit state.init_layoutsets up the header and intro of the page.query_cortex_search_servicehandles querying the Cortex Search Service via the Python client library.create_filter_objectprocesses selected filter attributes from the Streamlit form into the right objects to be used by the Python library for querying Cortex Search.distinct_values_for_attributedetermines which values are possible for each filterable attribute to populate the dropdown menus.init_search_input,init_limit_input,init_attribute_selectioninitialize inputs for the search query, limit of number of results, and attribute filters.display_search_resultsformats search results into Markdown elements displayed in the results page.
Step 5: Clean up
Clean up (optional)
Execute the following DROP <object> commands to return your system to its state before you began the tutorial:
Dropping the database automatically removes all child database objects such as tables.
Next steps
Congratulations! You have successfully built a simple search app on text data in Snowflake. You can move on to Tutorial 2 to see how to layer on Cortex LLM Functions to build an AI chatbot with Cortex Search.
Additional resources
Additionally, you can continue learning using the following resources: