Tutorial 1: Create a Snowpark Container Services Service
Introduction
After completing the common setup, you are ready to create a service. In this tutorial, you create a
service (named echo_service) that simply echoes back text that you provide as input. For example, if the input string is
“Hello World,” the service returns “I said, Hello World.”
There are two parts to this tutorial:
Part 1: Create and test a service. You download code provided for this tutorial and follow step-by-step instructions:
- Download the service code for this tutorial.
- Build a Docker image for Snowpark Container Services, and upload the image to a repository in your account.
- Create a service by providing the service specification file and the compute pool in which to run the service.
- Create a service function to communicate with the service.
- Use the service. You send echo requests to the service and verify the response.
Part 2: Understand the service. This section provides an overview of the service code and highlights how different components collaborate.
1: Download the service code
Code (a Python application) is provided to create the Echo service.
- Download SnowparkContainerServices-Tutorials.zip.
- Unzip the content, which includes one directory for each tutorial. The
Tutorial-1directory has the following files:Dockerfileecho_service.pytemplates/basic_ui.html
2: Build an image and upload
Build an image for the linux/amd64 platform that Snowpark Container Services supports, and then upload the image to the image repository in your account (see Common Setup).
You will need information about the repository (the repository URL and the registry hostname) before you can build and upload the image. For more information, see Registry and Repositories.
Get information about the repository
-
To get the repository URL, execute the SHOW IMAGE REPOSITORIES SQL command.
-
The
repository_urlcolumn in the output provides the URL. An example is shown: -
The host name in the repository URL is the registry host name. An example is shown:
-
Build image and upload it to the repository
-
Open a terminal window, and change to the directory containing the files you unzipped.
-
To build a Docker image, execute the following
docker buildcommand using the Docker CLI. Note the command specifies current working directory (.) as thePATHfor files to use for building the image.- For
image_name, usemy_echo_service_image:latest.
Example
- For
-
Upload the image to the repository in your Snowflake account.
-
For Docker to upload an image on your behalf to your repository, first authenticate Docker with the registry.
- We recommend using Snowflake CLI to authenticate your local Docker instance with the image registry for your Snowflake account. Make sure that you configured Snowflake CLI to connect to Snowflake. For more information, see Configuring Snowflake CLI and connecting to Snowflake.
- To authenticate, execute the following Snowflake CLI command:
-
To upload the image, execute the following command:
Example
-
3: Create a service
In this section you create a service.
To create a service, you need the following items:
- A compute pool. Snowflake runs your service in the specified compute pool. You created a compute pool named
tutorial_compute_poolas part of the common setup. - A service specification. This specification provides Snowflake with the information needed to configure and run your service. For more information, see Snowpark Container Services: Working with services. In this tutorial, you provide the specification inline, in CREATE SERVICE command. You can also save the specification to a file in your Snowflake stage and provide file information in the CREATE SERVICE command as shown in Tutorial 2.
The following sections explain how to create a service by using SQL or Snowsight. Use one of the methods to create a service.
Note
You can create a service by using SQL or Snowsight. However, you can’t perform the preceding step, by uploading an image to image repository, cannot be done using Snowsight.
Create a service by using SQL
-
Verify that the compute pool is ready and that you are in the right context to create the service.
- Previously you set the context in the Common Setup step. To ensure you are in the right context for the SQL statements in this step, execute the following:
- To ensure the compute pool you created in the common setup is ready, execute
DESCRIBE COMPUTE POOL, and verify that thestateisACTIVEorIDLE. If thestateisSTARTING, you need to wait until thestatechanges to eitherACTIVEorIDLE.
-
To create the service, execute the following command using
test_role:Note
If a service with that name already exists, use the DROP SERVICE command to delete the previously created service, and then create this service.
-
Execute the following SQL commands to get detailed information about the service you just created. For more information, see Snowpark Container Services: Working with services.
-
To list services in your account, execute the SHOW SERVICES command:
-
To get information about your service including the service status, execute the DESCRIBE SERVICE command.
Verify the
statuscolumn shows the service status as RUNNING; if the status is PENDING, it indicates the service is still starting. To investigate why the service is not RUNNING, execute the SHOW SERVICE CONTAINERS IN SERVICE command and review thestatusof individual containers:
-
Create a service by using Snowsight
Sign in to Snowflake and complete the following steps to create a service:
-
In the navigation menu, select Monitoring » Services & jobs.
-
Under Create new, select Create new service.
-
On the Create service page, provide the following information:
-
Service details:
- In the top-right corner, from the role selector menu, select
test_role. - Specify the Service details:
- Service name:
echo_service - Compute pool:
tutorial_compute_pool - Location to store:
tutorial_db.data_schema - Select Next.
- Service name:
- In the top-right corner, from the role selector menu, select
-
Service specification: You can get this information from the service specification in the preceding section.
-
On the Containers tab, specify the following information:
- Name:
echo - Image:
TUTORIAL_REPOSITORY.my_echo_service_image:latest
- Name:
-
On the Endpoints tab, specify the following information:
- Name:
echoendpoint - Network port:
8080 - Protocol:
HTTP - Select the Allow public access checkbox.
- Name:
-
Select Next.
-
-
-
To create the service, select Create.
Snowflake creates the service and displays the service details.
Note
The SQL version of creating the service in the preceding section includes an environment variable (SERVER_PORT) that changes the network port the code listens on to 8000. The Snowsight version of the tutorial doesn’t provide this override. Therefore, we specify the network port as 8080, which is the default in the code.
To use Snowsight and use some of the service specification’s advanced features, you can provide a YAML version of the service specification in the UI.
4: Use the service
First, setup the context for the SQL statements in this section, execute the following:
Now you can communicate with the Echo service. As explained in Using a service, you can use the service in the following ways:
- From a SQL query by using a service function
- From outside Snowflake, which is called network ingress
In the following sections you use these methods to communicate with the Echo service.
Communicate with your service by using a service function
A service function is one of the methods available to communicate with your service. A service function is a user-defined function (UDF) that you associate with the service endpoint. When the service function is executed, it sends a request to the service endpoint, and hen receives a response.
To create a service function, execute the following command:
In the query:
- The SERVICE property associates the UDF with the
echo_serviceservice. - The ENDPOINT property associates the UDF with the
echoendpointendpoint within the service. - AS ‘/echo’ specifies the HTTP path to the Echo server. You can find this path in the service code:
echo_service.py.
You can invoke the service function in a query.
The example service function, my_echo_udf, can take either a single string or a list of strings as input.
Example 1.1: Pass a single string
-
To call the
my_echo_udfservice function, execute the following SELECT statement, passing one input string ('hello'):Snowflake sends a POST request to the service endpoint (
echoendpoint). Upon receiving the request, the service echos the input string in the response:
If service is created by using Snowsight, the following response is returned:
Example 1.2: Pass a list of strings
When you pass a list of strings to the service function, Snowflake batches these input strings, and then sends a series of POST requests to the service. After the service processes all the strings, Snowflake combines the results, and then returns them.
The following example passes a table column as input to the service function.
-
Create a table with multiple strings:
-
Verify that the table was created:
-
To call the service function, execute the following SELECT statement, passing table rows as input:
Output:
Communicate with your service by using a web browser
The service exposes the endpoint publicly. For details, see the inline specification provided in the CREATE SERVICE command. Therefore, you can sign in to a web UI that the service exposes to the internet, and then send requests to the service from a web browser.
-
Find the URL of the public endpoint that the service exposes:
The
ingress_urlcolumn in the response provides the URL.Example
-
Append
/uito the endpoint URL, and then paste it in the web browser. This causes the service to execute theui()function (seeecho_service.py).The first time you access the endpoint URL, you are asked to sign in to Snowflake. For this test, use the same user that you used to create the service to ensure that the user has the necessary privileges.
-
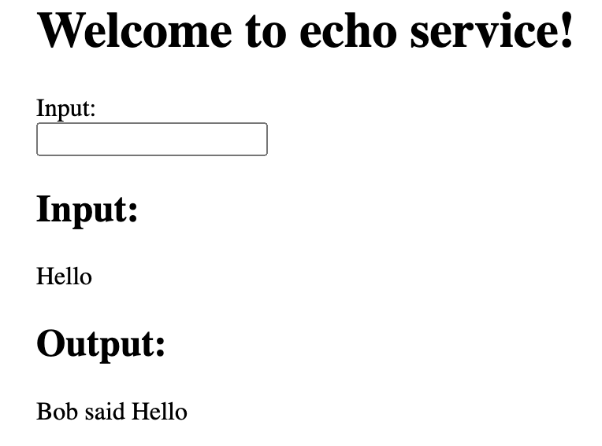
In the Input box, enter string “Hello”, and then press Return (Enter).
Note
You can access the public endpoint programmatically. For more information, see Tutorial 8: Access the public endpoint programmatically.
5: Clean up
If you don’t plan to continue with Tutorial 2 or Tutorial 4, you should remove billable resources you created. For more information, see Step 5 in Tutorial 4.
6: Reviewing the service code
This section covers the following topics:
- Examining the tutorial 1 code: Review the code files that implement the Echo service.
- Understanding the service function: This section explains how the service function in this tutorial is linked with the service.
- Building and testing an image locally. The section provides an explanation of how you can locally test the Docker image before uploading it to a repository in your Snowflake account.
Examining the tutorial 1 code
The zip file you downloaded in Step 1 includes the following files:
Dockerfileecho_service.pytemplates/basic_ui.html
You also use service specification when creating the service. The following section explains how these code components work together to create the service.
echo_
This Python file contains the code that implements a minimal HTTP server that returns (echoes back) input text. The code primarily performs two tasks: handling echo requests from Snowflake service functions, and providing a web user interface (UI) for submitting echo requests.
In the code:
-
The
echofunction enables a Snowflake service function to communicate with the service. This function specifies the@app.post()decoration as shown:When the echo server receives your HTTP POST request with the
/echopath, the server routes the request to this function. The function executes and echoes back the strings from the request body in the response.To support communication from a Snowflake service function, this server implements the external functions. That is, the server implementation follows a certain input/output data format in order to serve a SQL function, and this is the same input/output data format used by External Functions.
-
The
uifunction section of the code displays a web form and handles echo requests submitted from the web form. This function uses the@app.route()decorator to specify that requests for/uiare handled by this function:The Echo service exposes the
echoendpointendpoint publicly (see service specification), enabling communication with the service over the web. When you load the URL of the public endpoint with /ui appended in your browser, the browser sends an HTTP GET request for this path, and the server routes the request to this function. The function executes and returns a simple HTML form for the user to enter a string in.After the user enters a string and submits the form, the browser sends an HTTP post request for this path, and the server routes the request to this same function. The function executes and returns an HTTP response containing the original string.
-
The
readiness_probefunction uses the@app.get()decorator to specify that requests for/healthcheckare handled by this function:This function enables Snowflake to check the readiness of the service. When the container starts, Snowflake wants to confirm that the application is working and that the service is ready to serve the requests. Snowflake sends an HTTP GET request with this path (as a health probe, readiness probe) to ensure that only healthy containers serve traffic. The function can do whatever you want.
-
The
get_loggerfunction helps set up logging.
Dockerfile
This file contains all the commands to build an image using Docker.
The Dockerfile contains instructions to install the Flask library in the Docker container. The code in echo_service.py
relies on the Flask library to handle HTTP requests.
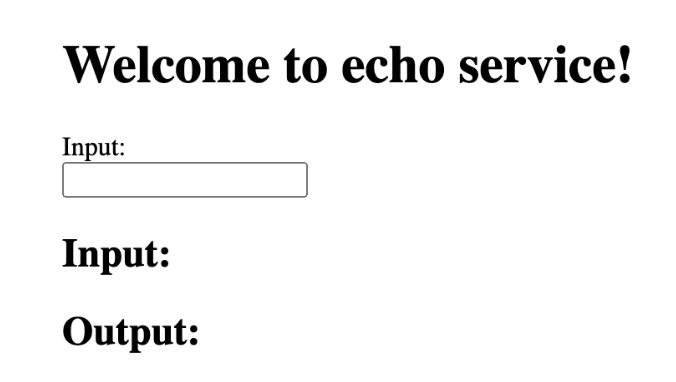
/template/basic_
The Echo service exposes the echoendpoint endpoint publicly (see service specification), enabling communication with the
service over the web. When you load the public endpoint URL with /ui appended in your browser, the Echo service displays
this form. You can enter a string in the form and submit the form, and the service returns the string in an HTTP response.
Service specification
Snowflake uses information you provide in this specification to configure and run your service.
In the service specification:
-
The
containers.imagespecifies the image for Snowflake to start a container. -
The optional
endpointsfield specifies the endpoint the service exposes.- The
namespecifies a user-friendly name for the TCP network port the container is listening on. You use this user-friendly endpoint name to send requests to the corresponding port. Note that theenv.SERVER_PORTcontrols this port number. - The endpoint is also configured as
public. This allows traffic to this endpoint from the public web.
- The
-
The optional
containers.envfield is added to illustrate how you might override environment variables that Snowflake passes to all processes in your container. For example, the service code (echo_service.py) reads the environment variables with default values as shown:It works as follows:
-
When the Echo service receives an HTTP POST request with a string (e.g., “Hello”) in the request body, the service returns “I said Hello” by default. The code uses the
CHARACTER_NAMEenvironment variable to determine the word before “said.” By default,CHARACTER_NAMEis set to “I.”You can overwrite the CHARACTER_NAME default value in the service specification. For example, if you set the value to “Bob,” the Echo service returns a “Bob said Hello” response.
-
Similarly, the service specification overrides the port (SERVER_PORT) that the service listens on to 8000, overriding the default port 8080.
-
-
The
readinessProbefield identifies theportandpaththat Snowflake can use to send an HTTP GET request to the readiness probe to verify that the service is ready to handle traffic.The service code (
echo_python.py) implements the readiness probe as follows:Therefore, the specification file includes the
container.readinessProbefield accordingly.
For more information about service specifications, see Service specification reference.
Understanding the service function
A service function is one of the methods of communicating with your service (see Using a service). A service function is a user-defined function (UDF) that you associate with a service endpoint. When the service function is executed, it sends a request to the associated service endpoint and receives a response.
You create the following service function by executing the CREATE FUNCTION command with the following parameters:
Note the following:
- The
my_echo_udffunction takes a string as input and returns a string. - The SERVICE property identifies the service (
echo_service), and the ENDPOINT property identifies the user-friendly endpoint name (echoendpoint). - The AS ‘/echo’ specifies the path for the service. In
echo_service.py, the@app.postdecorator associates this path with theechofunction.
This function connects with the specific ENDPOINT of the specified SERVICE. When you invoke this function, Snowflake sends a
request to the /echo path inside the service container.
Building and testing an image locally
You can test the Docker image locally before uploading it to a repository in your Snowflake account. In local testing, your container runs standalone (it is not a service that Snowflake runs).
To test the Tutorial 1 Docker image:
-
To create a Docker image, in the Docker CLI, execute the following command:
-
To launch your code, execute the following command:
-
Send an echo request to the service using one of the following methods:
-
Using the cURL command:
In another terminal window, using cURL, send the following POST request to port 8080:
Note that the request body includes two strings. This cURL command sends a POST request to port 8080 on which the service is listening. The 0 in the data is the index of the input string in the list. The Echo service echoes the input strings in response as shown:
-
Using a web browser:
-
In your browser, on the same computer, open
http://localhost:8080/ui.This sends a GET request to port 8080, which the service is listening on. The service executes the
ui()function, which renders a HTML form as shown:
-
Enter the string “Hello” in the Input box, and press Return.
-
-
What’s next?
You can now test the Tutorial 2 that executes a job.