Tutorial 3: Create a service and a job using the Snowflake Python APIs
Introduction
In Tutorial 1 and Tutorial 2, you use the SQL interface to create a Snowpark Container Services service and job. In this tutorial you use the Snowflake Python APIs to create the same service and job and thus explore using the Snowflake Python APIs to manage Snowpark Container Services resources.
The tutorial uses a Snowflake notebook to execute the Python code, but the code is independent of the notebook and you can execute the code in other environments.
1: Initial configuration
In this initial configure, you create a Snowflake notebook, import libraries you need, and define constants that are used by cells in the subsequent steps.
-
Create a Snowflake notebook.
- Create a notebook. For instructions, see Create a new notebook. Note that the Python environment you choose in the UI (Run on warehouse or Run on container) doesn’t matter.
- From the Packages drop-down menu, choose the “snowflake” package and install the latest version of the Snowflake Python APIs library.
- (Optional) Delete the cells provided in the notebook by default. As you follow the steps in this tutorial, you add Python cells to the notebook.
-
Create and run the cell to import Python libraries used by many cells in this tutorial.
from snowflake.snowpark.context import get_active_session
from snowflake.core import Root
from snowflake.core import CreateMode
-
Create and run the cell to define constants that you use in subsequent cells. The values provided below match Tutorials 1 and 2. You can optionally change these values.
current_user = get_active_session().get_current_user()
user_role_name = "test_role"
compute_pool_name = "tutorial_compute_pool"
warehouse_name = "tutorial_warehouse"
database_name = "tutorial_db"
schema_name = "data_schema"
repo_name = "tutorial_repository"
stage_name = "tutorial_stage"
service_name = "echo_service"
print("configured!")
2: Create Snowflake objects
Before you can create a service, you need Snowflake objects, such as a database, a user, a role, a compute pool, and an image repository. Some of these objects are account-scoped object that require administrative privileges to create them. The names of the objects created are defined in the preceding step.
2.1: Create account-scoped Snowflake objects
The following Python code creates these objects:
- Role (
test_role). You grant this role all the privileges required to create and use the service. In the code, you grant this role to the current user to enable the user to create and use the service.
- Database (
tutorial_db). In the next step, you create a schema in this database.
- Compute pool (
tutorial_compute_pool). Your service container executes in this compute pool.
- Warehouse (
tutorial_warehouse). When the service connects to Snowflake and executes queries, this warehouse is used to execute the queries.
Create and run the cell to create these account-scoped objects using the ACCOUNTADMIN role. Note that the script creates resources only if they don’t exist. The comments in the code show the equivalent SQL statements.
from snowflake.core.compute_pool import ComputePool
from snowflake.core.database import Database
from snowflake.core.grant import Grant, Grantees, Privileges, Securable, Securables
from snowflake.core.role import Role
from snowflake.core.warehouse import Warehouse

session = get_active_session()
session.use_role("ACCOUNTADMIN")
root = Root(session)

# CREATE ROLE test_role;
root.roles.create(
    Role(name=user_role_name),
    mode=CreateMode.if_not_exists)
print(f"Created role:", user_role_name)

# GRANT ROLE test_role TO USER <user_name>
root.grants.grant(Grant(
    securable=Securables.role(user_role_name),
    grantee=Grantees.user(name=current_user),
    ))

# CREATE COMPUTE POOL IF NOT EXISTS tutorial_compute_pool
#   MIN_NODES = 1 MAX_NODES = 1
#   INSTANCE_FAMILY = CPU_X64_XS
root.compute_pools.create(
    mode=CreateMode.if_not_exists,
    compute_pool=ComputePool(
        name=compute_pool_name,
        instance_family="CPU_X64_XS",
        min_nodes=1,
        max_nodes=2,
    )
)

# GRANT USAGE, OPERATE, MONITOR ON COMPUTE POOL tutorial_compute_pool TO ROLE test_role
root.grants.grant(Grant(
    privileges=[Privileges.usage, Privileges.operate, Privileges.monitor],
    securable=Securables.compute_pool(compute_pool_name),
    grantee=Grantees.role(name=user_role_name)
    ))

print(f"Created compute pool:", compute_pool_name)

# CREATE DATABASE IF NOT EXISTS tutorial_db;
root.databases.create(
    Database(name=database_name),
    mode=CreateMode.if_not_exists)

# GRANT ALL ON DATABASE tutorial_db TO ROLE test_role;
root.grants.grant(Grant(
    privileges=[Privileges.all_privileges],
    securable=Securables.database(database_name),
    grantee=Grantees.role(name=user_role_name),
    ))

print("Created database:", database_name)

# CREATE OR REPLACE WAREHOUSE tutorial_warehouse WITH WAREHOUSE_SIZE='X-SMALL';
root.warehouses.create(
    Warehouse(name=warehouse_name, warehouse_size="X-SMALL"),
    mode=CreateMode.if_not_exists)

# GRANT USAGE ON WAREHOUSE tutorial_warehouse TO ROLE test_role;
root.grants.grant(Grant(
    privileges=[Privileges.usage],
    grantee=Grantees.role(name=user_role_name),
    securable=Securables.warehouse(warehouse_name)
    ))

print("Created warehouse:", warehouse_name)

# GRANT BIND SERVICE ENDPOINT ON ACCOUNT TO ROLE test_role
root.grants.grant(Grant(
    privileges=[Privileges.bind_service_endpoint],
    securable=Securables.current_account,
    grantee=Grantees.role(name=user_role_name)
    ))

print("Done: GRANT BIND SERVICE ENDPOINT")
As you create resources, the code also grants required privileges to the role (test_role) so the role can use these resources. Additionally, note that the echo service you create in this tutorial exposes one public endpoint. This public endpoint allows other users in your account to access the service from the public web (ingress). To create a service with a public endpoint, the role (test_role) must have the BIND SERVICE ENDPOINT privilege on the account.
2.2 Create schema-scoped objects
The Python code in this section uses the test_role role to create a schema and objects in that schema. You don’t need administrative privileges to create these resources.
- Schema (
data_schema). You create an image repository, service, and job in this schema.
- Image repository (
tutorial_repository). You store your application image in this repository.
- Stage (
tutorial_stage). The stage is created only for illustration. While not demonstrated in this tutorial, stages can be used to pass data into
or collect data from your services.
Note that the script creates resources only if they don’t exist.
from snowflake.core.image_repository import ImageRepository
from snowflake.core.schema import Schema
from snowflake.core.stage import Stage, StageDirectoryTable

session = get_active_session()
session.use_role(user_role_name)
root = Root(session)

# CREATE SCHEMA IF NOT EXISTS {schema_name}
schema = root.databases[database_name].schemas.create(
    Schema(name=schema_name),
    mode=CreateMode.if_not_exists)
print("Created schema:", schema.name)

# CREATE IMAGE REPOSITORY IF NOT EXISTS {repo}
repo = schema.image_repositories.create(
    ImageRepository(name=repo_name),
    mode=CreateMode.if_not_exists)
print("Create image repository:", repo.fully_qualified_name)

repo_url = repo.fetch().repository_url
print("image registry hostname:", repo_url.split("/")[0])
print("image repository url:", repo_url + "/")


#CREATE STAGE IF NOT EXISTS tutorial_stage
#  DIRECTORY = ( ENABLE = true );
stage = schema.stages.create(
    Stage(
        name=stage_name,
        directory_table=StageDirectoryTable(enable=True)),
    mode=CreateMode.if_not_exists)
print("Created stage:", stage.fully_qualified_name)
The Python code also prints out useful information about the repository (the repository URL) that you use when pushing your images to the repository.
3: Build an image and upload
You download locally the code as described in Tutorial 1, use Docker commands to build the image, and upload it to the image repository in your account.
-
Create and run the cell to obtain the hostname of your image registry and the URL to your image repository.
session = get_active_session()
session.use_role(user_role_name)
root = Root(session)

schema = root.databases[database_name].schemas[schema_name]
repo =  schema.image_repositories[repo_name]

repo_url = repo.fetch().repository_url
print("image registry hostname:", repo_url.split("/")[0])
print("image repository url:", repo_url + "/")
The Python code retrieves the image repository resource object (repo), accesses the model object, and extracts the repository URL from it.
-
Follow Tutorial 1 steps 1 and 2 to download the service code, build an image, and upload it to the repository.
-
Create and run the cell to verify the image is in the repository.
session = get_active_session()
session.use_role(user_role_name)
root = Root(session)

schema = root.databases[database_name].schemas[schema_name]

repo = schema.image_repositories[repo_name]
for image in repo.list_images_in_repository():
 print(image.image_path)
The code enumerates the images from the image repository resource (repo) and prints the image_path for each image.
4: Create a service
Create a service and a service function to communicate with the service.
-
Verify that the compute pool is ready. After you create a compute pool, it takes some time for Snowflake to provision all the nodes. Ensure that
the compute pool is ready before creating a service, because service containers execute within the specified compute pool.
Create and run the cell to get the compute pool status:
import time

session = get_active_session()
session.use_role(user_role_name)
root = Root(session)

cp = root.compute_pools[compute_pool_name]

cpm = cp.fetch()
print(cpm.state, cpm.status_message)
if cpm.state == 'SUSPENDED':
 cp.resume()
while cpm.state in ['STARTING', 'SUSPENDED']:
 time.sleep(5)
 cpm = cp.fetch()
 print(cpm.state, cpm.status_message)
The code fetches the compute pool model (cpm) from the compute pool resource (cp) to retrieve the current compute pool state. If the compute pool is suspended, the code resumes the compute pool. The code loops, pausing for five seconds each time, until the compute pool is no longer in the STARTING or SUSPENDED state.
The last line of output should be “IDLE” or “ACTIVE”, which indicates that the compute pool is ready to run your service. For more information, see Compute pool lifecycle. If the compute pool is not ready, your services can’t start.
-
Create and run the cell to create the echo service.
from snowflake.core.service import Service, ServiceSpec

session = get_active_session()
session.use_role(user_role_name)
root = Root(session)

schema = root.databases[database_name].schemas[schema_name]

repo = schema.image_repositories[repo_name]
repo_url = repo.fetch().repository_url

specification = f"""
 spec:
   containers:
   - name: echo
     image: {repo_url}/my_echo_service_image:latest
     env:
       SERVER_PORT: 8000
       CHARACTER_NAME: Bob
     readinessProbe:
       port: 8000
       path: /healthcheck
   endpoints:
   - name: echoendpoint
     port: 8000
     public: true

 """
echo_service = schema.services.create(Service(
 name=service_name,
 compute_pool=compute_pool_name,
 spec=ServiceSpec(specification),
 min_instances=1,
 max_instances=1),
 mode=CreateMode.if_not_exists)
print("created service:", echo_service.name)
The code retrieves the repository URL, as done in the preceding step.
The code then creates the echo_service using an inline specification and the image from the specified image repository.
As you see from the Python code, it’s easy to parameterize the names of resources. The following is the equivalent SQL command that creates a service but doesn’t use parameters.
CREATE SERVICE echo_service
  IN COMPUTE POOL tutorial_compute_pool
  FROM SPECIFICATION $$
 spec:
   containers:
   - name: echo
     image: /tutorial_db/data_schema/tutorial_repository/my_echo_service_image:latest
     env:
       SERVER_PORT: 8000
       CHARACTER_NAME: Bob
     readinessProbe:
       port: 8000
       path: /healthcheck
   endpoints:
   - name: echoendpoint
     port: 8000
     public: true
  $$
  MIN_INSTANCES=1
  MAX_INSTANCES=1;
-
Run the cell to create a service function (my_echo_function). A service function is one of the ways of using the service.
from snowflake.core.function import ServiceFunction, FunctionArgument

session = get_active_session()
session.use_role(user_role_name)
root = Root(session)

schema = root.databases[database_name].schemas[schema_name]

# CREATE FUNCTION my_echo_udf (inputtext VARCHAR)
#  RETURNS VARCHAR
#  SERVICE=echo_service
#  ENDPOINT=echoendpoint
#  AS '/echo';
svcfn = schema.functions.create(mode=CreateMode.or_replace,
 function=ServiceFunction(
     name="my_echo_function",
     arguments=[FunctionArgument(name="inputtext", datatype="TEXT")],
     returns="TEXT",
     service=service_name,
     endpoint="echoendpoint",
     path="/echo"))
print("created service function:", svcfn.name_with_args)
The code calls the create method on the functions collection of the schema to create the service function (my_echo_function).
5: Use the service
In this section, you use the service as follows:
- Invoke the service function.
- Use a browser to interact with the service’s public endpoint.
-
Invoke the service function.
svcfn = schema.functions["my_echo_function(TEXT)"]
print(svcfn.execute(["hello"]))
Snowflake sends a POST request to the service endpoint (echoendpoint). Upon receiving the request, the service echoes the input string in the response.
Output:
+--------------------------+
| **MY_ECHO_UDF('HELLO!')**|
|------------------------- |
| Bob said hello!          |
+--------------------------+
-
Access from a browser the public endpoint that the service exposes.
-
Get the URL of the public endpoint.
# helper to check if service is ready and return endpoint url
def get_ingress_for_endpoint(svc, endpoint):
    for _ in range(10): # only try 10 times
  # Find the target endpoint.
  target_endpoint = None
  for ep in svc.get_endpoints():
      if ep.is_public and ep.name == endpoint:
          target_endpoint = ep
          break;
  else:
      print(f"Endpoint {endpoint} not found")
      return None

  # Return endpoint URL or wait for it to be provisioned.
  if target_endpoint.ingress_url.startswith("Endpoints provisioning "):
      print(f"{target_endpoint.ingress_url} is still in provisioning. Wait for 10 seconds.")
      time.sleep(10)
  else:
      return target_endpoint.ingress_url
    print("Timed out waiting for endpoint to become available")

endpoint_url = get_ingress_for_endpoint(echo_service, "echoendpoint")
print(f"https://{endpoint_url}/ui")
-
Paste the printed URL in a browser window. This causes the service to execute the ui() function (see echo_service.py).
Note that the first time you access the endpoint URL, you will be asked to log in to Snowflake. For this test, use the same user that you used to create the service to ensure the user has the necessary privileges.
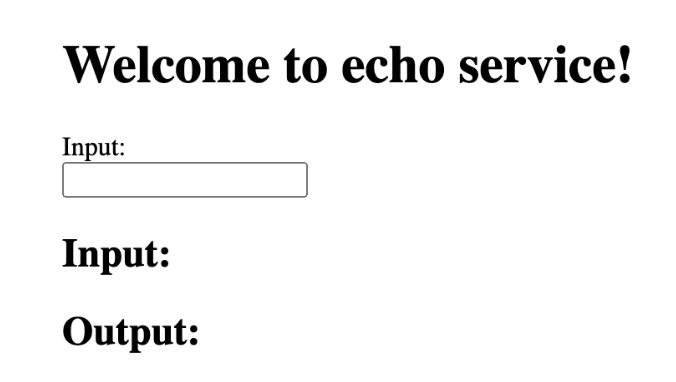
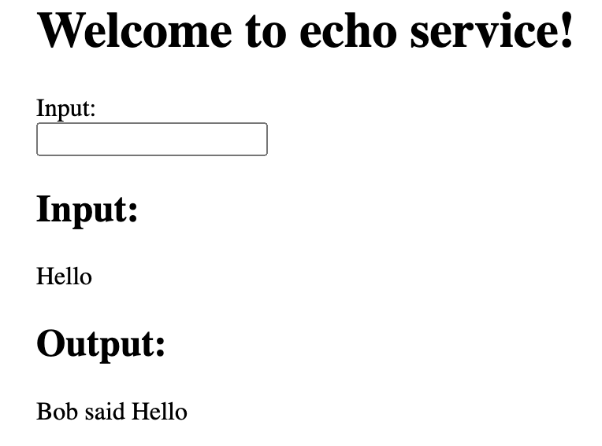
-
Enter the string “Hello” in the Input box, and press Return.
6: Create a job
In Tutorial 2, you use the SQL interface to create a Snowpark Container Services job. In this section, you create the same job using the Snowflake Python APIs.
-
Create and run the cell to obtain the hostname of your image registry and the URL to your image repository.
session = get_active_session()
session.use_role(user_role_name)
root = Root(session)

schema = root.databases[database_name].schemas[schema_name]
repo =  schema.image_repositories[repo_name]

repo_url = repo.fetch().repository_url
print("image registry hostname:", repo_url.split("/")[0])
print("image repository url:", repo_url + "/")
The Python code retrieves the image repository resource object (repo), accesses the model object, and extracts the repository URL from it.
-
Follow Tutorial 2 steps 1 and 2 to download the service code, build an image, and upload it to the repository.
-
Create and run the cell to verify the image is in the repository.
session = get_active_session()
session.use_role(user_role_name)
root = Root(session)

schema = root.databases[database_name].schemas[schema_name]

repo = schema.image_repositories[repo_name]
for image in repo.list_images_in_repository():
 print(image.image_path)
The code enumerates the images from the image repository resource (repo) and prints the image_path for each image.
-
Create and run the cell to create the job.
from snowflake.core.service import JobService, ServiceSpec

session = get_active_session()
session.use_role(user_role_name)
root = Root(session)

schema = root.databases[database_name].schemas[schema_name]

repo = schema.image_repositories[repo_name]
repo_url = repo.fetch().repository_url

job_name = "test_job"

# cleanup previous job if present.
schema.services[job_name].drop()(if_exists=True)

specification = f"""
 spec:
   containers:
   - name: main
     image: {repo_url}/my_job_image:latest
     env:
       SNOWFLAKE_WAREHOUSE: {warehouse_name}
     args:
     - "--query=select current_time() as time,'hello'"
     - "--result_table=results"
 """
job = schema.services.execute_job(JobService(
 name=job_name,
 compute_pool=compute_pool_name,
 spec=ServiceSpec(specification)))
print("executed job:", job.name, "status:", job.fetch().status)

print("job logs:")
print(job.get_service_logs(0, "main"))
The job runs the given query and stores the results in a table.
-
Run the following cell to review the result written to the table. This code uses Snowpark Python to query that table.
session = get_active_session()
session.use_role(user_role_name)
# show that above job wrote to results table
session.sql(f"select * from {database_name}.{schema_name}.results").collect()
7: Clean up
-
Stop the service and drop it. After dropping the service, Snowflake by default automatically suspends the compute pool (assuming there are no other services and job services running). For more information, see compute pool lifecycle.
session = get_active_session()
session.use_role(user_role_name)
root = Root(session)

schema = root.databases[database_name].schemas[schema_name]

# now let's clean up

schema.functions["my_echo_function(TEXT)"].drop()
schema.services[service_name].drop()
-
Drop the image repository to avoid paying for storage. Note that, if you have any other images stored in the repository they will be deleted.
schema.image_repositories[repo_name].drop()
-
Drop the schema. Dropping a schema also drops all objects in that schema. For this tutorial that includes the service, the function, the image repository, and the stage you created.
root.databases[database_name].schemas[schema_name].drop()
-
Instead of waiting for Snowflake to suspend your compute pool, you also can explicitly suspend the compute pool. In this case, Snowflake suspends any running services, and waits for any jobs running to finish, and then suspends the compute pool.
root.compute_pool[compute_pool_name].suspend()