Microsoft Power BI
Before you start
To connect Microsoft Power BI to Horizon Catalog, you will need…
- Admin access to Microsoft Entra ID (formerly Azure AD)
- Admin access to Microsoft Fabric (formerly Power BI Admin Portal)
Complete the following steps to enable metadata, lineage, and popularity of your Microsoft Power BI in Horizon Catalog.
1. Create an Azure app
-
Open the Azure Portal (https://ms.portal.azure.com/#allservices) and sign in.
-
Search for App registrations, and select it.
-
Click New registration.
-
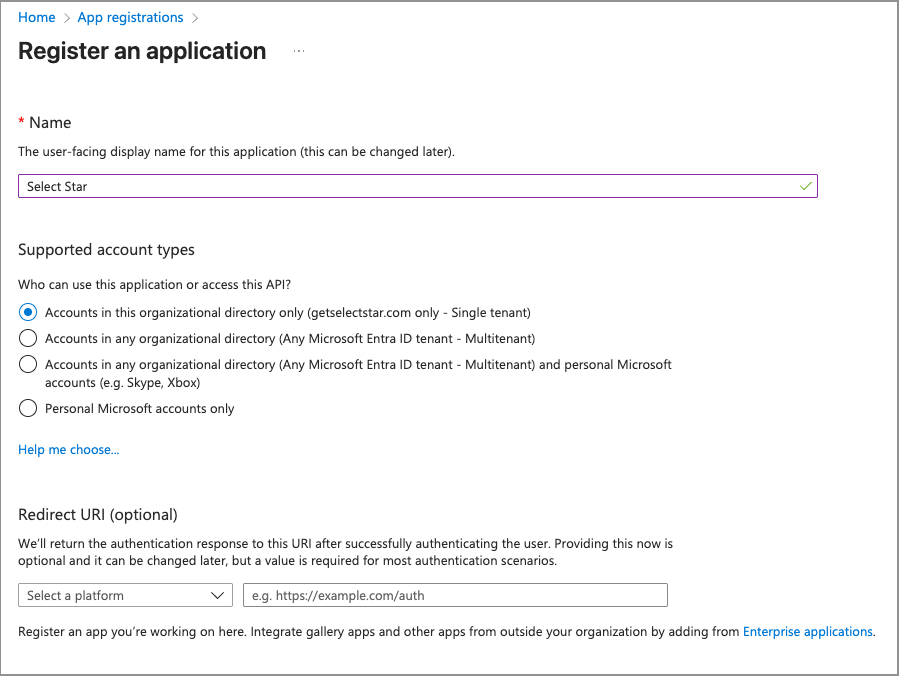
Fill in the required information:
- Name: type “Horizon Catalog”
- Supported account types: leave the default value (“Accounts in this organizational directory only - Single tenant”)
- Redirect URI - leave empty
-
Click Register.
-
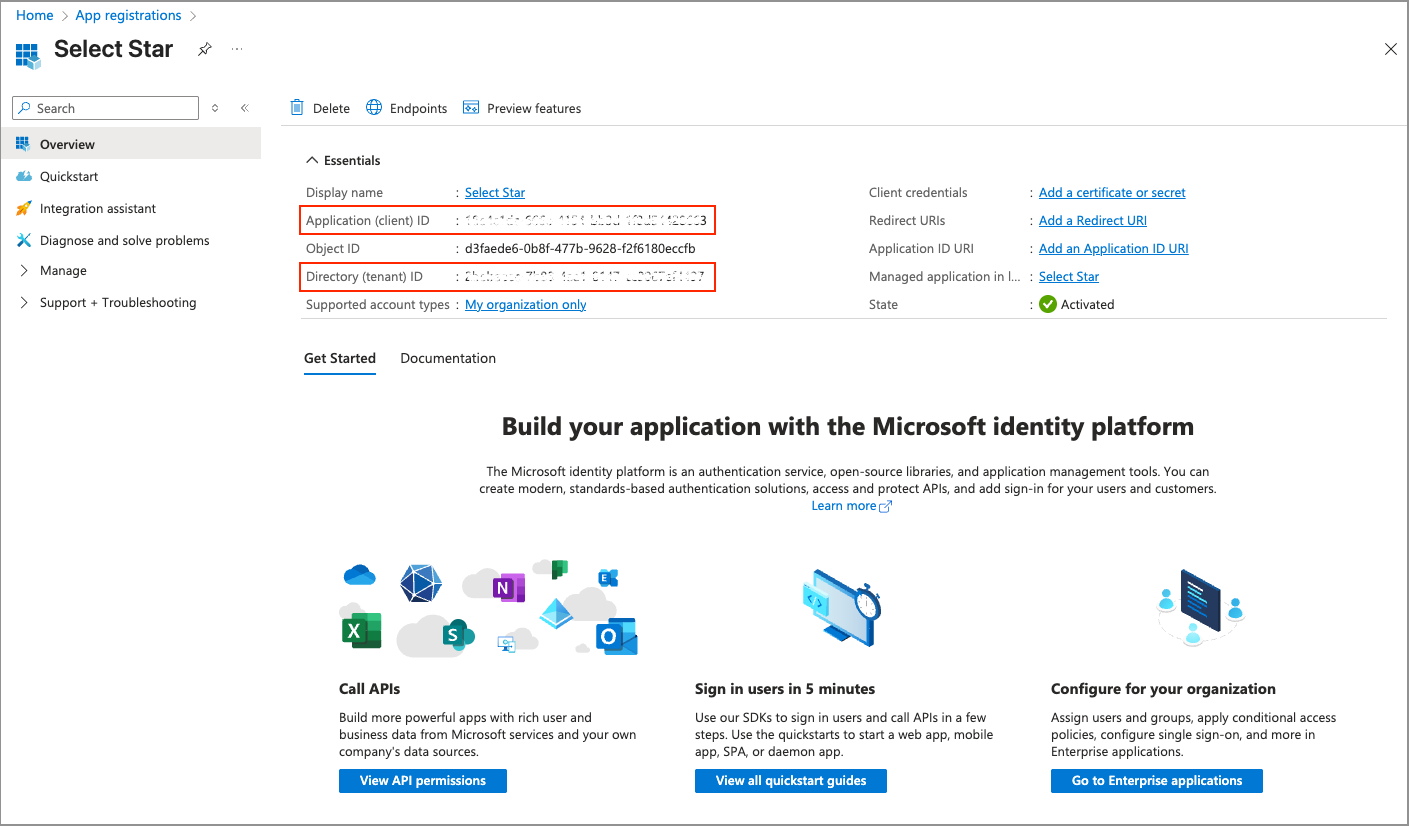
From the Overview page, copy the Application (client) ID and Directory (tenant) ID, and securely store them for next steps.
-
Click the Certificates & secrets from the left menu.
-
Under Client secrets, click + New client secret.
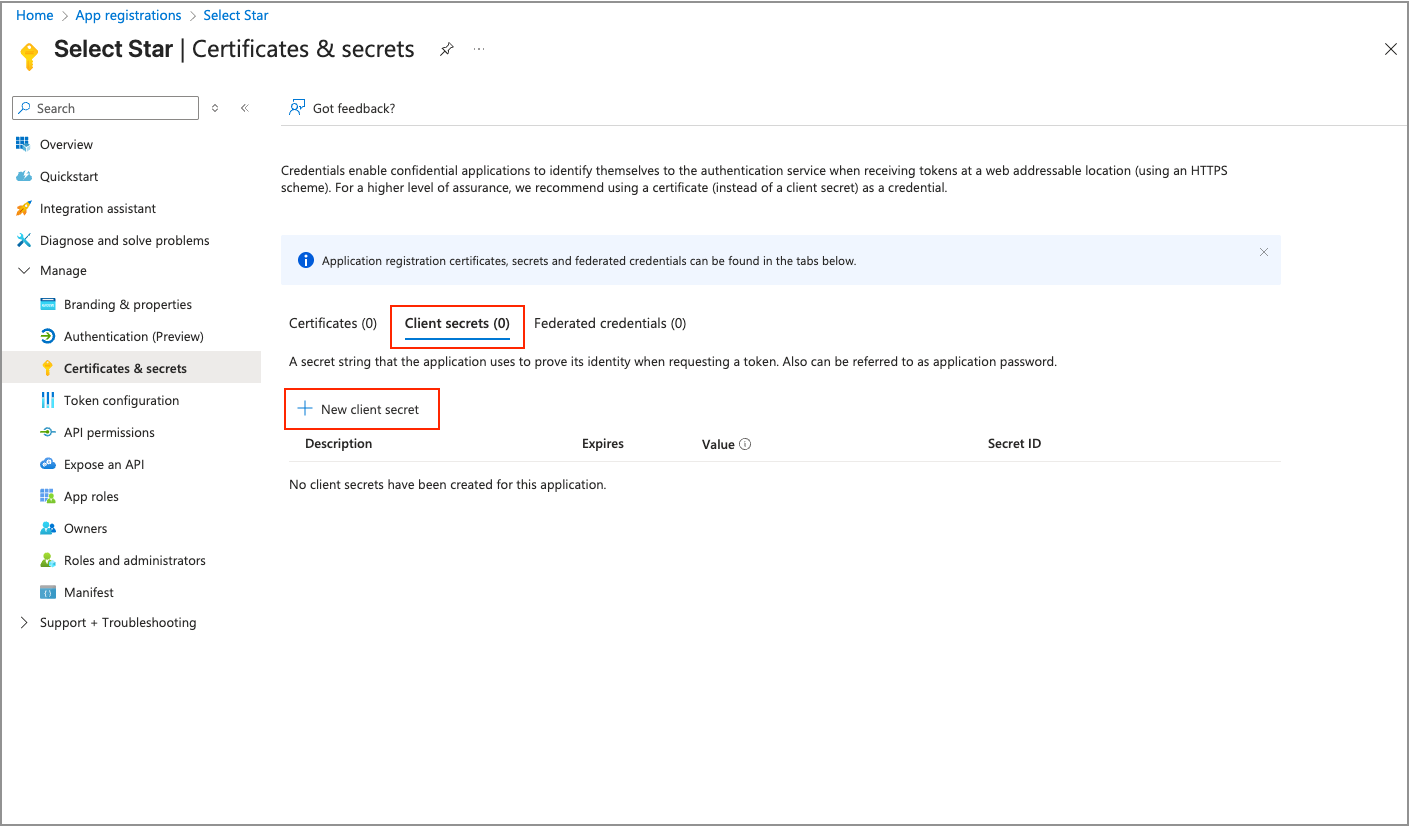
In the Add a client secret window, enter a description, select an expiry time, and click Add.
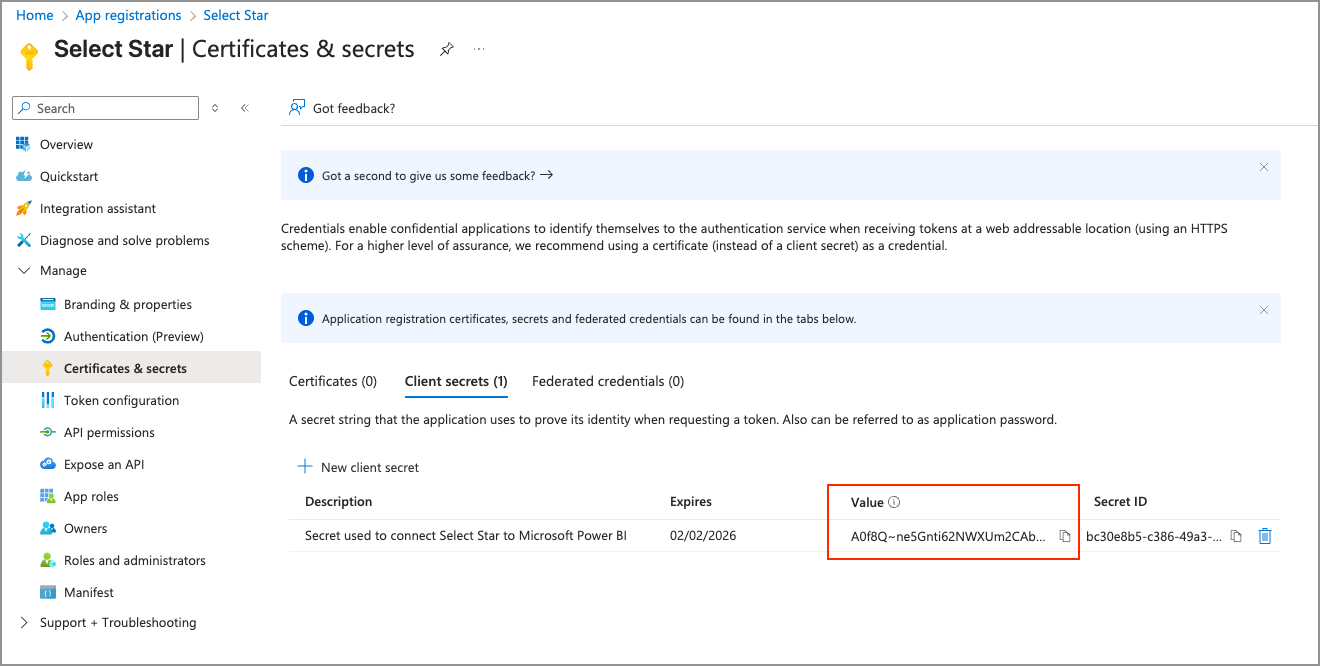
Copy the client secret Value and securely store it for the next steps.
2. Create a security group in Microsoft Entra ID
-
Open the Azure Portal (https://ms.portal.azure.com/#allservices) and sign in.
-
Search for Microsoft Entra ID, and select it.
-
Click the Groups, under Manage section.
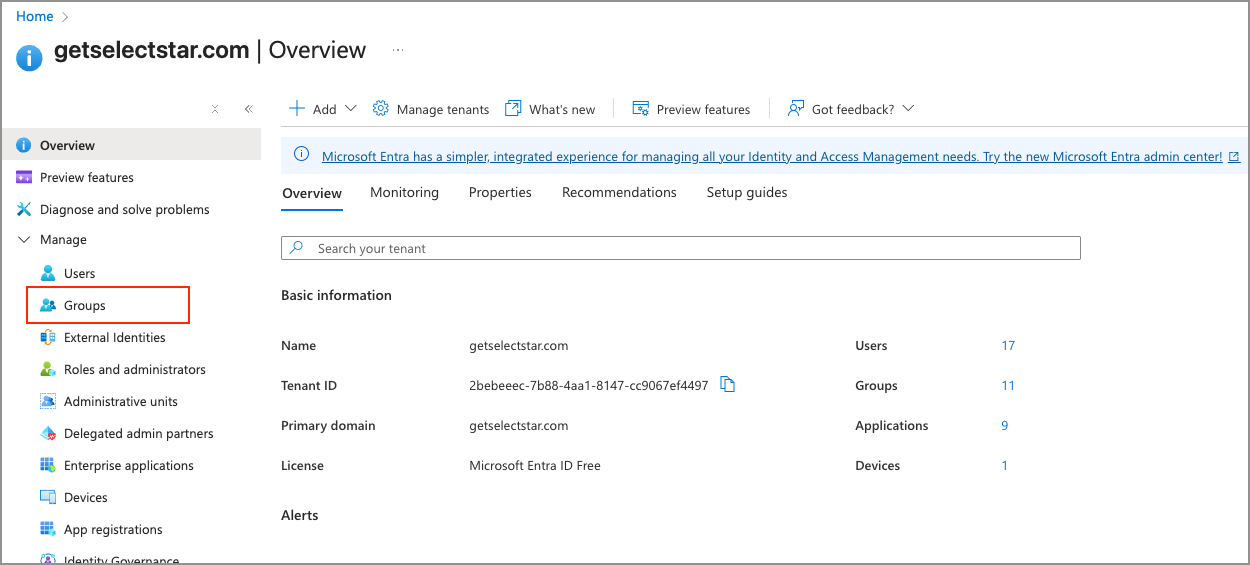
-
Click New group.
-
Fill in the required information:
- Group type - select “Security”
- Name - type “Power BI - API Access”
- Group description - enter any description or leave empty
-
Click “No members selected” to open a drawer. Search for Horizon Catalog user and select it. Click the Select button to confirm.
-
Click Create.
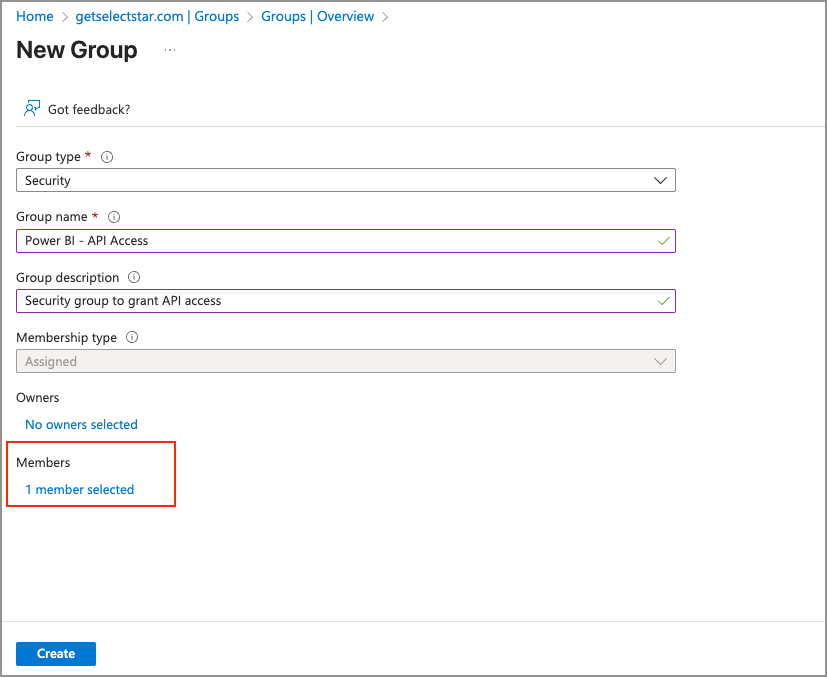
By the end of these steps, you have registered an application with Microsoft Entra ID and created a Security Group with the appropriate member.
3. Enable the Power BI service admin settings
-
Open Power BI admin portal (https://app.powerbi.com/admin-portal/) and sign in.
-
Click Tenant Settings under the Admin Portal.
- You must have admin access to Microsoft Fabric to configure these settings
-
Under Developer settings:
- Expand Service principals can call Fabric public APIs
- Set this to Enabled.
- Add your security group you created in Step 2, under Specific security groups.
- Click Apply.
- Expand Service principals can call Fabric public APIs
-
Repeat the process for the subsections under the Admin API settings section.
- Open the section, Set Enabled, and add the security group you created in Step 2. Click Apply.
You must complete the steps for the following sections under Admin API settings:
- Service principals can access read-only admin APIs
- Enhance admin APIs responses with detailed metadata
- Enhance admin APIs responses with DAX and mashup expressions
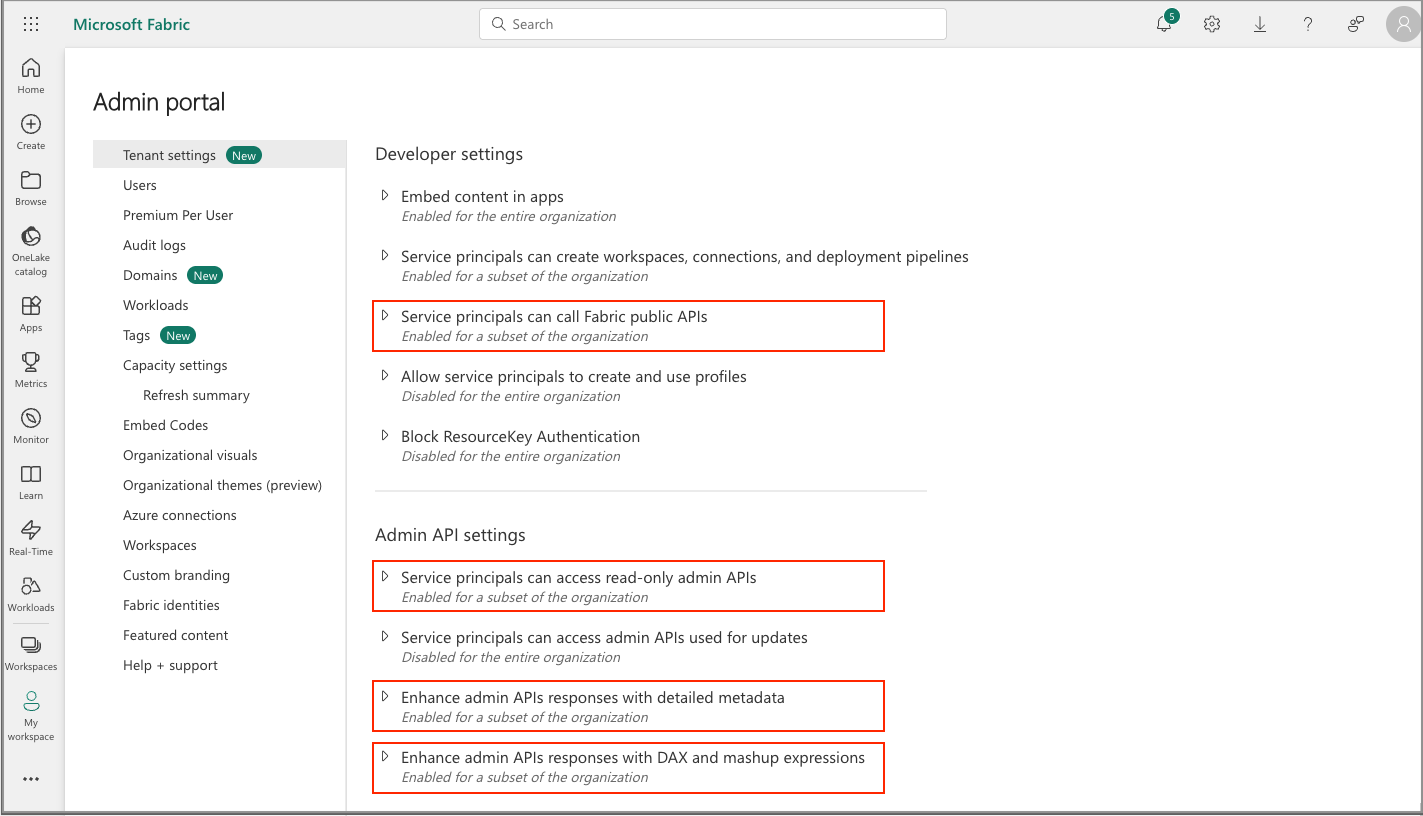
The screenshot shows the highlighted sections needed to be enabled for Microsoft Power BI Integration
4. Add Azure app to your workspace
-
Open Power BI (https://app.powerbi.com/) and sign in.
-
Search for the workspace you want to enable access for, and from the three-button menu, select Workspace access.
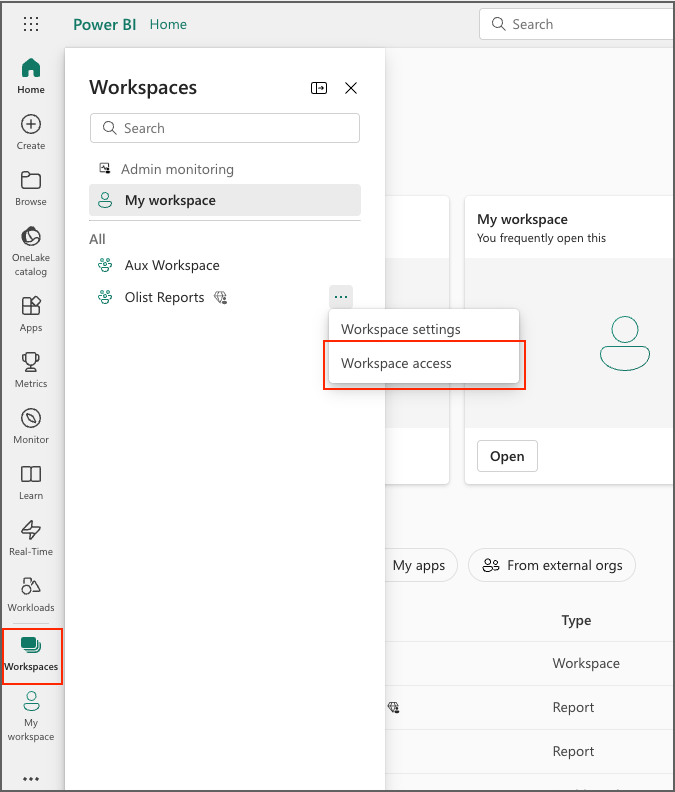
-
Click + Add people or groups
-
Search for the app you created in step 1, i.e., Horizon Catalog, and select it. Set the permissions to Contributor.
-
Click Add, and close the drawer.
-
Repeat the above steps for all workspaces you want to be added to Horizon Catalog.
Warning
Important! If you have any Power BI reports using Semantic Models from other workspaces, please make sure to add the Azure App you created in Step 1 as a Contributor to all those workspaces. This is required to ingest the reports’ metadata and generate the column-level lineage.
5. Create the Power BI connection
-
In Snowflake, open Catalog > Connections and select Power BI from the Metadata connections section.
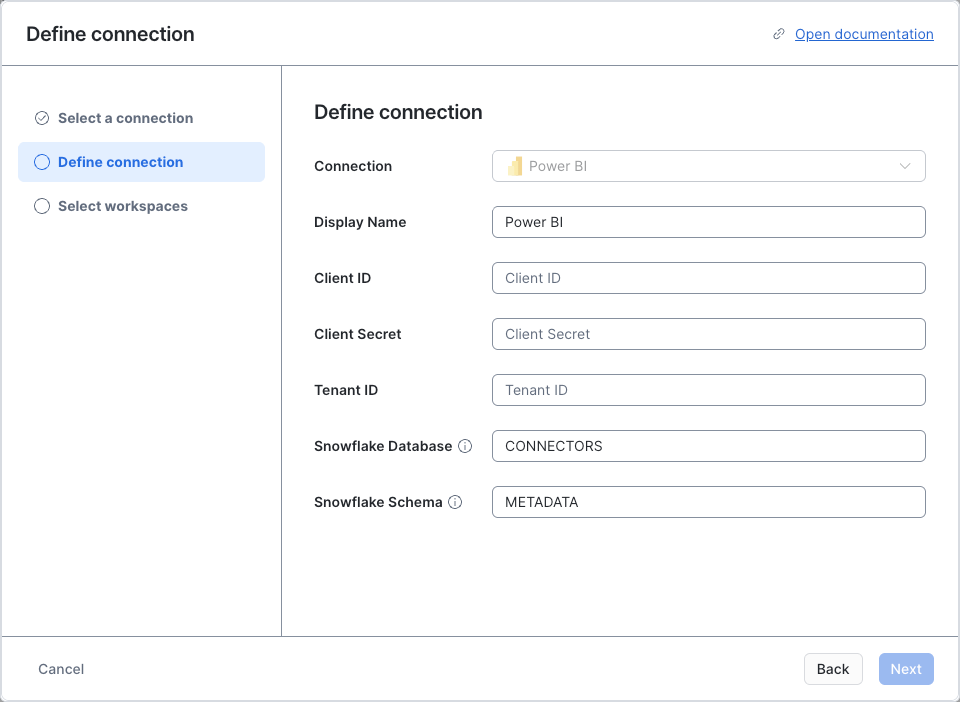
-
Fill in the required information:
- Client ID: Application (client) ID of Azure App from step 1.6 above.
- Client Secret: Client secret value of Azure App from step 1.8 above.
- Tenant ID: Directory (tenant) ID of Azure App from step 1.6 above.
Connection security
All communication between Horizon Catalog and Microsoft Power BI uses HTTPS (TLS 1.2 or higher). Authentication uses OAuth 2.0 client credentials via Microsoft Entra ID. No additional encryption configuration is required.
For more details, see Security and data protection.